Thursday, May 27, 2010

Daring Bakers: Piece Montée or Croquembouche (May 2010)

The May 2010 Daring Bakers’ challenge was hosted by Cat of Little Miss Cupcake. Cat challenged everyone to make a piece montée, or croquembouche, based on recipes from Peter Kump’s Baking School in Manhattan and Nick Malgieri.

Ahh...the traditional French wedding cake. Different and delicious. This month's challenge came as a relief in some ways. Since I'd just finished my classes at Cookology where we had made creme puffs, I knew I could ace that part of the challenge. *phew*

So, it was with a bit of an "I've got this one" attitude that I entered the kitchen. Honestly, it wasn't until I realized that the cream had to chill over night that I ran into my first problem. (I really do need to get better at reading the ENTIRE recipe before I start.) But, that was easily remedied...I'd just have to wait.

The pate choux recipe that was given worked like a charm for me. I used some of the tips I'd heard at the baking bootcamp classes and passed them along to my fellow Daring Bakers. The two that seemed to be most relevant were: 1) Dump all of the eggs in at once, not one at a time. I don't know why this works, but it does. Keep in mind that you must stir by hand with a wooden spoon and your arm will feel like it wants to fall off before you're done...this is normal. Smile! 2) As soon as the puffs come out of the oven, poke a hole in the top with a really sharp paring knife. This allows the steam to escape and helps the dough to not get soggy, thereby falling.

My puffs puffed beautifully, they stayed beautifully puffed. The creme came out super yummy. I was well on my way to Piece Montee success! It was once I started to fill the puffs that I realized, I shouldn't have halved the creme recipe as suggested. Sure, we were given two recipes (one for vanilla, which I made, and one for chocolate, which I thought I'd make but didn't), but I only made one. I didn't have a lot of finished creme puffs. But I pressed on thinking, "Ahh, no worries, it just won't be as tall!" This turned out to be true...and a bit sad.

The other area where I ran into trouble, I mean challenges which make me a better baker, were the stacking and glazing. Oh sure...chocolate was my choice, but only because making caramel still terrifies me. I know, I know... practice, practice, practice...but I wasn't in the mood to severely burn myself or ruin the few finished creme puffs I had. I don't think my chocolate glaze was much of a success though (as you'll see in the photos below).

Individually, the puffs looked and tasted wonderful. The filing was creamy and had just the right sweetness. The chocolate added a touch of glamour and the puff itself was airy and light. Ahh....if only the challenge had been to make creme puffs alone....
But, alas, the challenge was to stack these balls of deliciousness into a cone shape and drizzle beautifully. So, I started to stack, using chocolate as my glue. I think it went ok, it worked, it retained its shape and didn't fall over or crumble to the floor. That's success right?! Right?! :::Sigh:::

Once stacked, I turned to the glazing/drizzling part. I had a feeling now that this part of the challenge, which initially sounded like an afterthought, was going to be the most difficult. I was right. My chocolate should have been mixed into a ganache, but I didn't realize that until it was too late. SO, I got this:

Trust me, it tasted great....but I certainly won't be offering to make for a special occastion like a French wedding anytime soon....

This was a good reminder that sometimes, it's the simplest steps that trip us up. Onward....I will conquer caramel....someday....

The Recipe:
Piece Montée or Croquembouche
Preparation time:
 You will want to use your puff pastry batter and chocolate glaze or caramel as soon as it has been prepared and as close to serving time as possible. This is not a dessert that stores well and it may be a bit temperamental in humid areas as the glaze needs to harden to hold the choux together. The crème patissiere can be made a couple of days in advance and stored in the fridge until ready to use.

You will need approximately 10 minutes to prepare the puff pastry, 10 minutes to pipe and about 30 minutes to bake each batch. The crème patissiere should take about 10 minutes to cook and then will need to be cooled for at least 6 hours or overnight. The glazes take about 10 minutes to prepare.

Ingredients:

For the Vanilla Crème Patissiere (Half Batch)
1 cup (225 ml.) whole milk
2 Tbsp. cornstarch
6 Tbsp. (100 g.) sugar
1 large egg
2 large egg yolks
2 Tbsp. (30 g.) unsalted butter
1 Tsp. Vanilla

Dissolve cornstarch in ¼ cup of milk. Combine the remaining milk with the sugar in a saucepan; bring to boil; remove from heat.

Beat the whole egg, then the yolks into the cornstarch mixture. Pour 1/3 of boiling milk into the egg mixture, whisking constantly so that the eggs do not begin to cook.

Return the remaining milk to boil. Pour in the hot egg mixture in a stream, continuing whisking.

Continue whisking (this is important – you do not want the eggs to solidify/cook) until the cream thickens and comes to a boil. Remove from heat and beat in the butter and vanilla.

Pour cream into a stainless steel/ceramic bowl. Press plastic wrap firmly against the surface. Chill immediately and until ready to use.

For Chocolate Pastry Cream (Half Batch Recipe):
Bring ¼ cup (about 50 cl.) milk to a boil in a small pan; remove from heat and add in 3 ounces (about 80 g.) semisweet chocolate, finely chopped, and mix until smooth. Whisk into pastry cream when you add the butter and vanilla.

For Coffee Pastry Cream (Half Batch recipe)
Dissolve 1 ½ teaspoons instant espresso powder in 1 ½ teaspoons boiling water. Whisk into pastry cream with butter and vanilla.

Pate a Choux (Yield: About 28)
¾ cup (175 ml.) water
6 Tbsp. (85 g.) unsalted butter
¼ Tsp. salt
1 Tbsp. sugar
1 cup (125 g.) all-purpose flour
4 large eggs

For Egg Wash:
1 egg and pinch of salt

Pre-heat oven to 425◦F/220◦C degrees. Line two baking sheets with parchment paper.

Preparing batter:
Combine water, butter, salt and sugar in a saucepan over medium heat. Bring to a boil and stir occasionally. At boil, remove from heat and sift in the flour, stirring to combine completely.

Return to heat and cook, stirring constantly until the batter dries slightly and begins to pull away from the sides of the pan.

Transfer to a bowl and stir with a wooden spoon 1 minute to cool slightly.

Add 1 egg. The batter will appear loose and shiny.

As you stir, the batter will become dry-looking like lightly buttered mashed potatoes.

It is at this point that you will add in the next egg. Repeat until you have incorporated all the eggs.

Piping:
Transfer batter to a pastry bag fitted with a large open tip (I piped directly from the bag opening without a tip). Pipe choux about 1 inch-part in the baking sheets. Choux should be about 1 inch high about 1 inch wide.

Using a clean finger dipped in hot water, gently press down on any tips that have formed on the top of choux when piping. You want them to retain their ball shape, but be smoothly curved on top. Brush tops with egg wash (1 egg lightly beaten with pinch of salt).

Baking:
Bake the choux at 425◦F/220◦C degrees until well-puffed and turning lightly golden in color, about 10 minutes.

Lower the temperature to 350◦F/180◦C degrees and continue baking until well-colored and dry, about 20 minutes more. Remove to a rack and cool.

Can be stored in a airtight box overnight.

Filling:
When you are ready to assemble your piece montée, using a plain pastry tip, pierce the bottom of each choux. Fill the choux with pastry cream using either the same tip or a star tip, and place on a paper-lined sheet. Choux can be refrigerated briefly at this point while you make your glaze.

Use one of these to top your choux and assemble your piece montée.

Chocolate Glaze:
8 ounces/200 g. finely chopped chocolate (use the finest quality you can afford as the taste will be quite pronounced; I recommend semi-sweet)

Melt chocolate in microwave or double boiler. Stir at regular intervals to avoid burning. Use the best quality chocolate you can afford. Use immediately.

Hard Caramel Glaze:
1 cup (225 g.) sugar
½ teaspoon lemon juice

Combine sugar and lemon juice in a saucepan with a metal kitchen spoon stirring until the sugar resembles wet sand. Place on medium heat; heat without stirring until sugar starts to melt around the sides of the pan and the center begins to smoke. Begin to stir sugar. Continue heating, stirring occasionally until the sugar is a clear, amber color. Remove from heat immediately; place bottom of pan in ice water to stop the cooking. Use immediately.

Assembly of your Piece Montée:
You may want to lay out your unfilled, unglazed choux in a practice design to get a feel for how to assemble the final dessert. For example, if making a conical shape, trace a circle (no bigger than 8 inches) on a piece of parchment to use as a pattern. Then take some of the larger choux and assemble them in the circle for the bottom layer. Practice seeing which pieces fit together best.

Once you are ready to assemble your piece montée, dip the top of each choux in your glaze (careful it may be still hot!), and start assembling on your cake board/plate/sheet. Continue dipping and adding choux in levels using the glaze to hold them together as you build up.
When you have finished the design of your piece montée, you may drizzle with remaining glaze or use ribbons, sugar cookie cut-outs, almonds, flowers, etc. to decorate. Have fun and enjoy! Bon appétit!

Enjoy With Love,
Christina

Friday, May 14, 2010

Daring Cooks: Stacked Green Chile & Grilled Chicken Enchilada (May 2010)

Our hosts this month, Barbara of Barbara Bakes and Bunnee of Anna+Food have chosen a delicious Stacked Green Chile & Grilled Chicken Enchilada recipe in celebration of Cinco de Mayo! The recipe, featuring a homemade enchilada sauce was found on www.finecooking.com and written by Robb Walsh.

Ahhh, stacked enchilada....My mom used to make us a version of this dish often growing up. Sure, mom's was a bit more simple and easy to assemble, but she was serving to kids! I have fond memories of mom's stacked enchiladas so I was eager to try this recipe and see if it could come close to the version mom used to make.

First, a word of caution about this recipe...one learned from expereince. Buy your chiles and tomatillos as close to the time you'll use them as possible. They go south (ie. bad!) pretty fast. I had to re-purchase both TWICE! UGH...not fun, and certainly added to the expense of this rather inexpensive meal.

Roasting the chiles was fairly easy. Since I do not have a gas oven nor a barbeque of any sorts (remember, I use the George Foreman Grill!), I chose to roast them under the broiler. After I got the peppers covered in oil I popped them in the oven. They popped and sputtered and charred up nicely. I turned them a few times and made sure they were soft. I had the bowl with plastic wrap ready so that they could (essentially) steam away while they cooled. They were all done at different times, so it was a bit laborious because I had to keep checking on them (not a put it in and walk-away type activity).

Once the chiles were roasting, I decided to start the tomatillos. I boiled mine for about 10-12 minutes until they split and looked soft. Again, they weren't all done at the same time so I just stirred and dunked as needed until they were all done. I transferred them directly to the food processor when they were done and then gave them a quick whirl.

The chiles cooled enough that I could work with them by the time the tomatillos were done. I made quick work of taking off the skin and removing the seeds. Instead of mincing them like suggested, I just popped them into the same food processor and gave them a whirl....minced...super fine! HA!

The sauce never really did thicken up for me...but I figured it was probably something I had done wrong and just kept going...hoping it would still taste good and possibly thicken once in the oven.

I moved on to the chicken. I used my grill pan and seasoned the chicken with McCormick's Grill Mates Mesquite Seasoning. I shred it once it had rested for a bit and then got on with the tortillas and stacking process.

My mom used to pour a bit of oil into a small pan and basically dunk the tortillas in the hot oil, flip and then remove to paper towels. I used the same process since it seemed odd to have to keep adding oil to the pan.

Once I had the tortillas done, I started stacking on a cookie sheet. This step seemed unnecessary to me at first. All the ingredients were cooked, why bother baking?! But, in the spirit of the challenge, I went with it. I could have used a bit more of the sauce on the bottom of the pan (my finished product stuck a bit). I also LOVE cheese, so could have used more of that too. I got them all assembled and popped it into the oven.

When it came out, I must say that it looked really good. I was excited to try it and dig into what would now be lunch. After taking the glamour shots (below), I dug in. They were good! I could have used a bit more heat (spice), but I know that it's a personal preference and I didn't add any hot sauce during the process (worried it would turn out TOO spicy). Would I make this again...I may, but I must admit...mom's was still tastier for me, and much easier. I'll post both recipes, you decide.

Stacked Green Chile & Grilled Chicken Enchilada


The Recipe: Stacked Green Chile & Grilled Chicken Enchilada
Ingredients
1½ pounds Fresh Anaheim chiles (about eight 6 to 8 inch chiles) 24 ounces 678 grams - roast, peel, remove seeds, chop coarsely. Other green chiles (NOT bell peppers) could probably be substituted but be conscious of heat and size!)
7-8 ounces Tomatillos (about 4-5 medium)212 grams - peel, remove stems
4 cups Chicken broth (32 ounces/920 grams)
1 clove Garlic, minced
2 teaspoons yellow onion, minced
1 teaspoon dried oregano
½ tsp Kosher salt (add more to taste)
¼ tsp Black Pepper (add more to taste)
2 tablespoons Cornstarch (dissolve in 2 tablespoons water, for thickening)
Hot sauce, your favorite, optional
2 Boneless chicken breasts (you can also use bone-in chicken breasts or thighs)
3 tablespoons Olive oil or other neutral vegetable oil (use more as needed)
Kosher salt and pepper
12 Small Corn tortillas (5-6 inch/13-15 cm). (you can also use wheat tortillas or other wraps)
6 ounces grated Monterey Jack, 170 grams (other cheeses (cheddar, pepper jack, Mexican cheeses) can be used. Just be sure they melt well and complement the filling)
Cilantro for garnish, chopped and sprinkled optional

Directions:

Roasting Fresh Chiles
1. Coat each chile with a little vegetable oil. If you are doing only a couple chiles, using the gas stove works. For larger batches (as in this recipe), grilling or broiling is faster.

2. Lay the oiled chiles on the grill or baking sheet (line pan with foil for simpler clean-up). Place the grill or broil close to the element, turning the chiles so they char evenly. They should be black and blistered.

3. As they are completely charred (they will probably not all be done at once), remove them to a bowl and cover with plastic, or close up in a paper bag. Let them rest until they are cool.

4. Pull on the stem and the seed core MAY pop out (it rarely does for me). Open the chile and remove the seeds. Turn the chile skin side up and with a paring knife, scrape away the skin. Sometimes it just pulls right off, sometimes you really have to scrape it.

5. DO NOT RINSE!

Green Chile Sauce
1. Put a medium saucepan of water on to boil and remove the papery outer skin from the tomatillos. Boil the tomatillos until soft, 5 to 10 minutes. You can also grill the tomatillos until soft.

2. Drain and puree in a blender or food processor.

3. Return the tomatillos to the saucepan along with the chicken broth, chopped green chiles, minced onion, oregano, garlic, salt and pepper.

4. Bring to a boil over medium-high heat and then reduce the heat and simmer for 10 minutes.

5. Add the cornstarch/water mixture and stir well. Simmer, stirring occasionally, until the sauce is thickened and reduced to 4-5 cups, another 10-15 minutes.

6. Adjust seasonings and add hot sauce if you want a little more heat.

Stacked Green Chile and Grilled Chicken Enchiladas
1. Heat a gas grill to medium high or build a medium-hot charcoal Coat the chicken with olive oil and season well with salt and pepper. Preheat oven to 450 degrees.

2. Grill the chicken until just cooked through, 4-5 minutes a side for boneless chicken breasts.

3. Cool and then slice into thin strips or shred.

4. In a small skillet, heat 3 tablespoons oil over medium-high heat until very hot. Dip the edge of a tortilla into the oil to check – it should sizzle immediately.

5. Using tongs, put a tortilla into the pan and cook until soft and lightly brown on each side, about 15-20 seconds per side (at the most).

6. Drain on paper towels.

7. Add oil as needed and continue until all 12 tortillas are done.

8. In a baking dish large enough to hold four separate stacks of tortillas, ladle a thin layer of sauce.

9. Lay four tortillas in the dish and ladle another ½ cup (4 ounces/112 grams) of sauce over the tortillas.

10. Divide half the chicken among the first layer of tortillas, top with another ½ cup of sauce and 1/3 of the grated cheese.

11. Stack another four tortillas, top with the rest of the chicken, more sauce and another third of the cheese.

12. Finish with the third tortilla, topped with the remaining sauce and cheese.

13. Bake until the sauce has thickened and the cheese melted, about 20 minutes. Let rest for 5-10 minutes.

14. To serve, transfer each stack to a plate. Spoon any leftover sauce over the stacks and sprinkle with cilantro, if you wish. The stacks may also be cooked in individual gratin dishes.

Mom's Stacked Beef Enchiladas
Ingredients
1 lb hamburger meat
1 packet taco seasoning
1 can red enchilada sauce
Corn tortillas
Vegetable oil (or similar, neutral flavored oil)
Refried beans

Toppings:
Cheese, shredded (Mom normally used mild cheddar)
Lettuce, shredded
Tomatoes, chopped
Onions, chopped finely
Sour Cream
Other toppings of your choice such as jalepenos or hot sauce.

Directions:
Brown the hamburger meat, drain. Add taco seasoning mix (dry) and mix well.
Heat the enchilada sauce in a shallow skillet. Heat the refried beans in a bowl/pan.
Heat the oil over medium-high heat until very hot. Dip the edge of a tortilla into the oil to check – it should sizzle immediately.
Working quickly, Using tongs, put a tortilla into the pan of oil and cook until soft and lightly brown on each side, about 15-20 seconds per side (at the most). Immediately transfer to the enchildada sauce, coat with sauce. Once coated, place on the plate you will serve the enchilada on. Smear the base tortilla with a dollop of refried beans and sprinkle with a spoonful of meat. Repeat with an additonal tortilla in the sauce, place on top of bean and meat layer. Top with another layer of beans, meat and once final top tortilla coated in sauce. On top of the stack, add whatever toppings you prefer. Cheese will melt best if added first, then the lettuce, tomatoes, onions, sour cream, etc. Enjoy!

Note: Mom would make them one at a time letting each person help with the layers and adding their own toppings to their liking. You can make as many or as few layers of bean/meat as you want.

Enjoy with Love,
Christina

Thursday, April 29, 2010

Cookology Baking Bootcamp #4: Classic Breads

Tonight, Cookology's Chef Brad taught us how to make Classic Italian White Loaf with Onion and Cinnamon, Honey and Pecan Swirls.

The Classic Italian White Loaf with Onion is a yeast-based bread. How did we manage to get a yeast-based bread to rise so quickly you ask?! Well, Chef Brad taught us a neat trick of how to do it over a double boiler (essentially) and then again on the sheet pan it will bake on over the pot of warm water. It worked like a charm. The downside is you lose a bit of the bread (to the bottom which starts to bake), but the loaf was done in a matter of minutes versus hours!

The mixing and kneading was done again, all by hand. This time it seemed to really make a difference. I could see how someone using a mixer could actually over mix these breads and come up with tough bricks. The bread is best enjoyed while still warm...and it's so wonderful on its own that it doesn't even need butter!


The Cinnamon, Honey and Pecan Swirls were so easy to make I couldn't believe it! They're not yeast based and were baked in cupcake tins! The dough was light and airy, the cinnamon fillling sticky and sweet. I adore pecans so, of course, I loaded mine up. The icing was a simple powdered sugar/heavy cream based icing with the touch of honey. So sweet and gooey...just like a cinnamon roll should be.


This Baking Bootcamp was a ton of fun. I would highly recommend Cookology to those that enjoy learning about food and getting their hands dirty in the kitchen. I didn't learn a ton of new techniques from this class, but I still had a great time and picked up some really great tips and recipes.


Onion White Loaf

Flour – 1lb. 5 oz.
Salt - .4 oz
Water - 12 oz
Yeast - .75 oz.
Sugar - 2.75 oz
Butter - 2.75 0z
1/2 onion chopped

Mix water and yeast and let sit for 5 minutes.

Add sugar to water and stir until combined. Mix flour, salt, melted butter and water mixture together. Knead for 5 minutes until dough is smooth and elastic. Allow to rise in a warm place until doubled in bulk.

Punch down and shape into shape desired. Allow to rise for one hour and bake at 350 for approx. 25 minutes or until golden brown.

Quick Cinnamon Biscuits/Rolls
Adapted from The Moosewood Collectives Moosewood Restaurant New Classics
Yield: 9 biscuits

Cinnamon Sugar Filling
1/4 cup brown sugar
2 teaspoons cinnamon
1 teaspoon nutmeg

Biscuit Dough
2 1/2 cups unbleached white flour
2 tablespoons brown sugar, packed
2 teaspoons baking powder
1/2 teaspoon salt
1 1/2 cups plus 1 tablespoon heavy cream

Icing
6 tablespoons confectioners sugar
4 to 6 teaspoons milk or heavy cream

1. Preheat the oven to 400 degrees F.

2. For the Filling: In a small bowl, combine the brown sugar, cinnamon and nutmeg. Set aside.

3. For the Dough: In a large bowl, stir together the flour, brown sugar, baking powder and salt. Add 1 1/2 cups cream, and stir until the dough forms a ball, about 1 minute. With your hands, fold the dough over a few times in the bowl, until the dough is smooth.

4. Turn the dough out onto a lightly floured surface. Lightly flour your hands, and pat the dough into a 1/2-inch-thick rectangle, about 9 X 13 inches. Brush the surface of the dough with the remaining tablespoon of cream. Sprinkle evenly with the cinnamon sugar topping.

5. Starting from the long side, roll the dough into a cylinder. Slice into 9 equal rounds. Place the rounds, cut side down, into an ungreased 8-inch square baking dish or a pie plate. Bake for about 30 minutes, until the biscuits are lightly browned.

6. For the Icing: While the biscuits bake, mix together the confectioners sugar and milk or cream until smooth. When you remove the biscuits from the oven, immediately drizzle them with icing. Serve warm.

Enjoy With Love,
Christina

Thursday, April 22, 2010

Cookology Baking Bootcamp #3: Understanding Cakes

Cookology's Chef Brad put us to work tonight making Genoise Chocolate and Orange Cake with Citrus Spiced Chocolate Ganache and Lemon Lavender Cupcakes with Raspberry Cream Cheese Frosting.

The Genoise Chocolate and Orange Cake with Citrus Spiced Chocolate Ganache sounded divine. It even smelled great and we enjoyed some really wonderful chocolate while making it. For me though, the final product wasn't what I expected and honestly, didn't enjoy all that much. The ganache was great, the wine that they shared (a wonderful Riesling) were to die for...the cake though, for me it was a bit dry. I think I remember Chef Brad saying that this was by design and that it was a more European-acquired taste. Still looked pretty.


The Lemon Lavender Cupcakes with Raspberry Cream Cheese Frosting were much more up my alley. I think it was so much fun that in all of these classes we never used an electric mixer or Kitchen Aid type machine. Everything was done by hand, spatula or wisk....everything. Cream that butter and sugar together with your fingers! Messy, but fun and you really gain an appreciation for the texture of various ingredients.

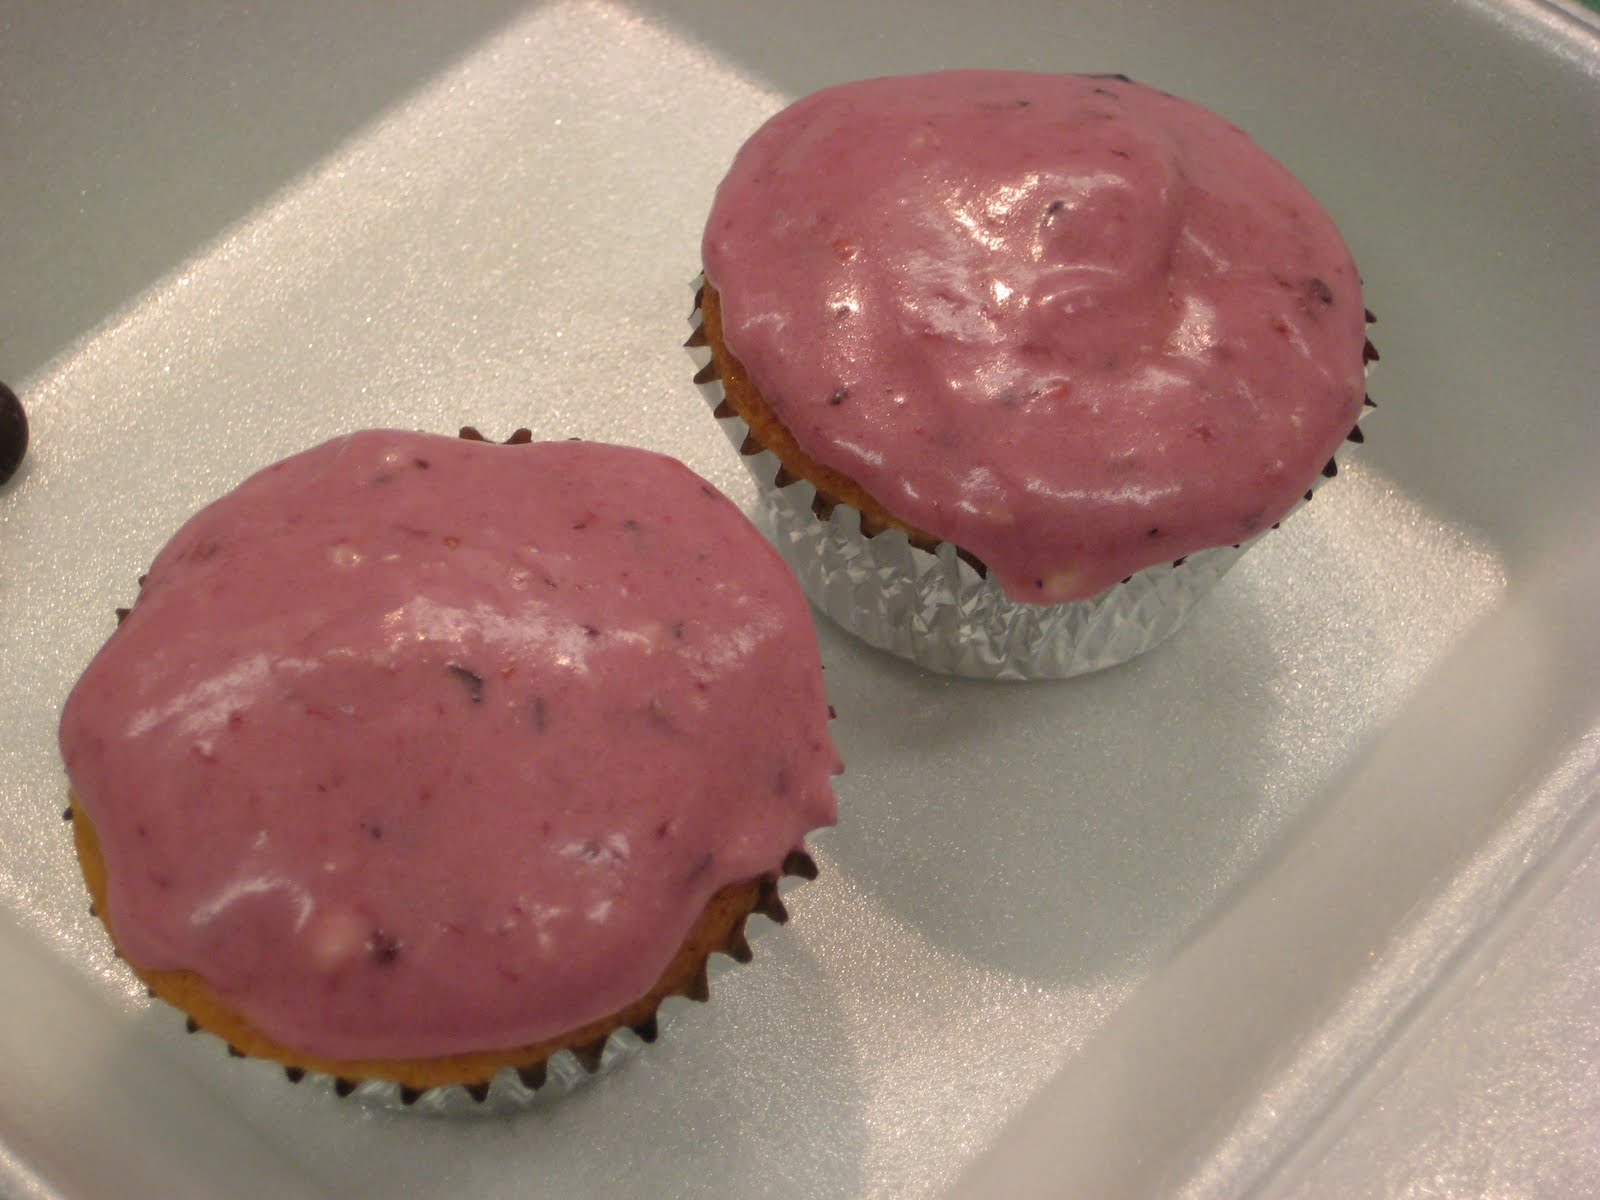
Chef Brad made the Raspberry Cream Cheese Frosting ahead of time so that it would have time to set and be ready for our cupcakes. It is sooooo good. So light yet has that cream cheesey taste that everyone loves. The cakes themselves were pretty much like you expect in a cupcake with a moist, light crumb. The lavender and lemon are perfect together and so refreshing. I will DEFINITELY be making these again. In fact, I took the leftover frosting from class so I could get a headstart. :-)


Recipes
Chocolate Genoise
3 tablespoons hot melted unsalted butter
1 teaspoon vanilla
½ cup cake flour
1/3 cup unsweetened dutch-processed cocoa powder
4 large eggs
2/3 cup granulated white sugar

Note: When warming the eggs and sugar, whisk constantly to ensure the eggs do not overheat and curdle.

Preheat oven to 350 degrees. Butter or spray a 9-inch round cake pan and then line the bottom of the pan with parchment paper.

In a small bowl, combine the melted unsalted butter with the vanilla. Keep this mixture warm. If needed, re-warm for a few second just before using.

In a medium bowl, sift together the flour and cocoa powder. Set aside.

In a large, heatproof bowl, whisk together the eggs and sugar. Place the bowl over a saucepan of simmering water. Whisking constantly, heat the eggs and sugar until lukewarm to the touch (this will take approximately 5 minutes depending on the temperature of the eggs and the simmering water). Remove from heat and transfer egg mixture to your electric mixer. Beat on high speed until the egg mixture has cooled, tripled in volume, and looks like softly whipped cream. This will take approximately 5 minutes and the batter is beaten sufficiently when the batter falls back into the bowl in a ribbon-like pattern.

Then sift about one-third of the flour mixture over the whipped eggs and fold using a large rubber spatula or whisk. Fold in half the remaining flour, and then fold in the rest. Do not over mix or you will deflate the batter. Then take about 1 cup of the batter and fold it into the hot butter mixture with a small spatula. (This will lighten the butter mixture and make it easier to incorporate into the egg batter without deflating it.) When completely combined, use a spatula to fold the butter mixture into the rest of the egg batter. Pour the batter into your prepared pan, smoothing the top.

Bake until the cake shrinks slightly from the edges of the pan and the top springs back when lightly pressed (about 20-25 minutes). Cool on a metal rack. When the cake has cooled completely, run a small knife or spatula around the edges to release the cake. The genoise will keep well-wrapped two days in the refrigerator or else three months frozen.

Chocolate Ganache
1 part chocolate
1 part cream
1 teaspoon of flavoring

Bring cream and flavor to boil. Pour over chocolate and stir to combine.

Lemon Cupcakes
2 cups all-purpose flour
1 ½ cups sugar (can use 1 ¼ cup for less sweet taste or ¾ cup Splenda)
2 ½ teaspoons baking powder
1 teaspoon salt
½ cup shortening (very soft but not melted, Crisco is best)
¾ cup milk (or half and half)
1 tablespoon vanilla (or 1 ½ teaspoons almond extract)
2 large eggs
Zest of one lemon

Preheat oven to 350 degrees.

In a large bowl, mix together the flour with sugar, baking powder and salt until combined.

Add in the shortening, milk, vanilla, lemon zest and eggs. Beat on medium speed scraping the bowl constantly until just blended (the batter will be thick, you may add a few more tablespoons of milk/cream if you desire).

Pour into paper-lined regular sized muffin tins, filling under ¾ full. Bake for 20-22 minutes or until the cupcakes test done. Immediately remove from pans. Cool completely before frosting.

Cream Cheese Frosting
1 cup butter (no substitutions), softened
½ cup cream cheese
8 cups confectioners’ sugar
2 teaspoons vanilla
½ cup milk

In a mixing bowl, cream butter and cream cheese together. Beat in sugar and vanilla. Add milk until frosting reaches desired consistency.

For Chocolate: Substitute ½ cup baking cocoa for ½ cup of the confectioners’ sugar.
For Peanut Butter: Substitute peanut butter for the butter.
For Lemon- or Orange-flavored: Substitute lemon or orange juice for milk and add 1 teaspoon grated lemon or orange zest.
For Almond- or Peppermint-flavored: Substitute almond or peppermint extract for the vanilla.

Enjoy with Love,
Christina

Wednesday, April 14, 2010

Daring Cooks: Brunswick Stew (April 2010)

The 2010 April Daring Cooks challenge was hosted by Wolf of Wolf’s Den. She chose to challenge Daring Cooks to make Brunswick Stew. Wolf chose recipes for her challenge from The Lee Bros. Southern Cookbook by Matt Lee and Ted Lee, and from the Callaway, Virginia Ruritan Club.


Well, folks, I missed the March challenge, which was Risotto and I know that I'm posting April extremely late. BUT, I did do the April challenge in time, I've just not had time to write and post...it's Spring afterall! I've been having too much fun at Baking Bootcamp and out with friends!
 
The April challenge also seemed a little off season for those of us in the US...this really would be much better to make in the fall. But, I realize that the Daring Cooks are an international group and this probably came just in time for those "down under" the equator.
 
Here's what our host, Wolf, had to say about Bruswick Stew:
"Brunswick Stew has a long, and oft debated history. Brunswick, Georgia claimed that the first Brunswick Stew was created there in 1898. There is, at the Golden Isles Welcome Center on Interstate 95, a bronzed stew pot with a plaque proclaiming this fact.

However, Brunswick, Virginia claims that the first Brunswick Stew was created there by a camp cook named Jimmy Matthews in 1828, for a hunting expedition led by Dr. Creed Haskings, a member of the Virginia State Legislature for a number of years. He was said to have used squirrel in the original Brunswick Stew created for the group when they returned. The hunters were at first skeptical of the thick, hearty concoction, but upon tasting it, were convinced and asked for more.

Every year, there is an Annual Brunswick Stew Cookoff that pits ‘Stewmasters’ from both Virgina and Georgia against their counterparts, and takes place every October in Georgia.

In the early 20th Cent, the rivalry of the two Brunswicks helped make this dish as popular as it is today, and it quickly became a pan-Southern classic. Some recipe call for the original addition of squirrel, but most allow for chicken, turkey, ham, or pork, even beef on occasion. Rabbit is also used. The vegetables can vary widely from variation to variation, however, the Brunswick Stewmasters recipe says *exactly* what is used in competion stews, and states that “Adding any additional ingredient(s) will disqualify the stew from being an original Brunswick Stew.”

However, most agree that, Brunswick stew is not done properly “until the paddle stands up in the middle.”"

The stew was not difficult to make. Very easy in fact once you assembled all of the ingredients. Nothing too wild (I used pork instead of rabbit afterall!). I must admit that it smelled divine while simmering away. The results were much like a thick and hearty chicken noodle soup, without the noodles. I didn't eat much of this stew, it was just too hearty for my tastes....maybe I'll try it again next fall or winter.
 
 
The Recipe: Brunswick Stew
From “The Lee Bros. Southern Cookbook: Stories and Recipes for Southerners and Would-Be Southerners” by Matt Lee and Ted Lee
Serves about 12

Ingredients:
1/4 lb / 113.88 grams / 4 oz slab bacon, rough diced
2 Serrano, Thai or other dried red chiles, stems trimmed, sliced, seeded, flattened
1lb / 455.52 grams / 16oz rabbit, quartered, skinned (I used pork)
1 4-5lb / 1822.08- 2277.6 grams / 64-80oz chicken, quartered, skinned, and most of the fat removed
1 Tablespoon / 14.235 grams / ½ oz sea salt for seasoning, plus extra to taste
2-3 quarts / 8-12 cups / 64.607-96.9oz Chicken Broth
2 Bay leaves
2 large celery stalks
2lbs / 911.04 grams / 32oz Yukon Gold potatoes, or other waxy type potatoes, peeled, rough diced
1 ½ cups / 344.88 grams / 12.114oz carrots (about 5 small carrots), chopped
3 ½ / 804.72 grams / 28.266oz cups onion (about 4 medium onions) chopped
2 cups / 459.84 grams / 16.152oz fresh corn kernels, cut from the cob (about 4 ears)
3 cups / 689.76 grams / 24.228oz butterbeans, preferably fresh (1 ¼ lbs) or defrosted frozen
1 35oz can / 996.45 grams / 4 cups whole, peeled tomatoes, drained
¼ cup / 57.48 grams / 2.019 oz red wine vinegar
Juice of 2 lemons
Tabasco sauce to taste

Directions:
1. In the largest stockpot you have, which is hopefully larger than the 5 qt ones I have, preferably a 10-12 qt or even a Dutch Oven if you’re lucky enough to have one, fry the bacon over medium-high heat until it just starts to crisp. Transfer to a large bowl, and set aside. Reserve most of the bacon fat in your pan, and with the pan on the burner, add in the chiles. Toast the chiles until they just start to smell good, or make your nose tingle, about a minute tops. Remove to bowl with the bacon.

2. Season liberally both sides of the rabbit and chicken pieces with sea salt and pepper. Place the rabbit pieces in the pot and sear off all sides possible. You just want to brown them, not cook them completely. Remove to bowl with bacon and chiles, add more bacon fat if needed, or olive oil, or other oil of your choice, then add in chicken pieces, again, browning all sides nicely. Remember not to crowd your pieces, especially if you have a narrow bottomed pot. Put the chicken in the bowl with the bacon, chiles and rabbit. Set it aside.

3. Add 2 cups of your chicken broth or stock, if you prefer, to the pan and basically deglaze the4 pan, making sure to get all the goodness cooked onto the bottom. The stock will become a nice rich dark color and start smelling good. Bring it up to a boil and let it boil away until reduced by at least half. Add your remaining stock, the bay leaves, celery, potatoes, chicken, rabbit, bacon, chiles and any liquid that may have gathered at the bottom of the bowl they were resting in. Bring the pot back up to a low boil/high simmer, over medium/high heat. Reduce heat to low and cover, remember to stir every 15 minutes, give or take, to thoroughly meld the flavors. Simmer, on low, for approximately 1 ½ hours. Supposedly, the stock may become a yellow tinge with pieces of chicken or rabbit floating up, the celery will be very limp, as will the chiles. Taste the stock, according to the recipe, it “should taste like the best chicken soup you’ve ever had”.

4. With a pair of tongs, remove the chicken and rabbit pieces to a colander over the bowl you used earlier. Be careful, as by this time, the meats will be very tender and may start falling apart. Remove the bay leaf, celery, chiles, bacon and discard.5 After you’ve allowed the meat to cool enough to handle, carefully remove all the meat from the bones, shredding it as you go. Return the meat to the pot, throwing away the bones. Add in your carrots, and stir gently, allowing it to come back to a slow simmer. Simmer gently, uncovered, for at least 25 minutes, or until the carrots have started to soften.

5. Add in your onion, butterbeans, corn and tomatoes. As you add the tomatoes, crush them up, be careful not to pull a me, and squirt juice straight up into the air, requiring cleaning of the entire stove. Simmer for another 30 minutes, stirring every so often until the stew has reduced slightly, and onions, corn and butterbeans are tender. Remove from heat and add in vinegar, lemon juice, stir to blend in well. Season to taste with sea salt, pepper, and Tabasco sauce if desired.

6. You can either serve immediately or refrigerate for 24 hours, which makes the flavors meld more and makes the overall stew even better. Serve hot, either on its own, or with a side of corn bread, over steamed white rice, with any braised greens as a side.

Enjoy with Love,
Christina

Tuesday, April 13, 2010

Cookology Baking Bootcamp #2: Pies and Tartlets

Wow! This week's class was so yummy! Cookology's Chef Brad showed us how to make Classic French Silk Chocolate Pie with Whipped Cinnamon Cream Topping and Mixed Berry and Rum Tartlets! Both were soooo good!

Again, we paired up with partners and shared the tasks of mixing and measuring. We started with the graham cracker crusts for our chocolate pies. Fairly basic recipe/technique for a graham crust. The main part of this pie is the custard....it didn't use cornstarch to thicken it! Instead, it used flour! We had to be careful to boil it only to a certain point so that the custard wouldn't burn...I was in charge of whisking while it was on the heat but made sure that my partner and Chef Brad were both close-by with watchful eyes. I certainly didn't want to be the reason our chocolate pies turned to burnt chocolate pies!

After successfully pouring the custard into the crusts the pies went into the freezer to set...while the class enjoyed the absolutely wonderful leftover warm custard....we were going to run out of tasting spoons quickly if something wasn't done! The pots were whisked away to be emptied and cleaned...we had another recipe to work through!

The tartlets started by us making the mixed berry mix. Interestingly enough we used frozen berries. Since I have friends in the food industry that have shared the secret of frozen fruits and veggies (they are picked and frozen at peak freshness!), I wasn't too worried about using the frozen nuggets. We let the berries marry with the sugar, cornstarch and the delicious smelling Port while we moved on to the dough.

Most people are scared of dough. Personally, I have had some success and some failures...usually it's all about the fact that I cook it too long and it burns! The recipe was fairly straight forward and we used the best utensils made to cut in the butter....our hands! The hardest part of the tartlets for me was crimping them. I'm always too delicate with my crimping and then things explode....so I went back over my crimps, which of course made them a bit messy. Since Chef Brad was in charge of the actual baking, they came out beautiful!

To pass the time while the tarts were baking, Chef Brad showed us how to make a cinnamon whipped cream. He'd already made a whipped cream and then just added the cinnamon and folded. Folding always gets me...I was glad he was doing that part. We got to taste it before we put it on our now set Classic French Silk Chocolate Pies. MMMMM...so good! So good in fact that my partner and I munched our way through the leftover raw pie dough, berry mixure and some of the cream. It was dinner...I'm sure my blood sugars didn't approve but my taste buds won that battle!

We learned a lot about good vanilla (and Chef Brad even shared how to make it!), good Port and of course, how to make these wonderful desserts. The pie was too die for smooth and creamy while the tartlets were flaky and full of slighly tart/slightly sweet fresh berries. Both are something that I would very easily make again and share with friends and family.

Below are the glamor shots of the final products.

Classic French Silk Chocolate Pie Before Cinnamon Whipped Cream

Classic French Silk Chocolate Pie After Cinnamon Whipped Cream

Mixed Berry Tartlets

Next week: Understanding Cakes! (I'm told we won't work in partners....my coworkers may get to feast on the goodies afterall!)

Recipes:
Mixed Berry Tartlets


Pie Dough
2 ½ cups all-purpose flour, plus more for rolling
1 teaspoon salt
1 teaspoon sugar
1 cup (2 sticks) cold, unsalted butter, cut into pieces
4 -8 tablespoons of ice-water

Berry Filling:
Berries
Sugar
Cornstarch
Lemon Juice

Egg Wash

In a food processor, combine flour, salt and sugar; pulse to combine. Add butter; pulse until mixture resembles coarse meal, with just a few pea-size pieces of butter remaining. Sprinkle with 4 tablespoons of ice-water. Pulse until dough is crumbly but holds together when squeezed with fingers (If necessary, add up to 4 tablespoons more of water, 1 tablespoon at a time). To help ensure flaky crust, do not over process. Transfer half of the dough (still crumbly) onto a piece of plastic wrap. Form into a square ¾ inch thick; wrap tightly in plastic. Repeat with other half. Refrigerate until firm; at least 1 hour (and up to 3 days).

Prepare the berry filling by tossing together berries, sugar, cornstarch and lemon juice. (Amounts depend on freshness/juiciness of berries).

Preheat the oven to 425. On a lightly floured surface, roll first disk out to an 8 x 12 rectangle. Cut into six 4-inch squares. Spoon berry mixture into the center of each square. Brush 2 opposite sides of each square with egg wash and fold into triangles. Crimp edges to seal. Transfer to a parchment paper lined baking sheet. Repeat with second dough. Brush tops with egg wash. Sprinkle with sugar, if desired, and make ½ inch incision to create a steam vent in the middle of each triangle. Bake until golden brown and crisp, about 20-25 minutes, rotating sheet pan halfway through.

Chocolate Pie Filling
½ cup sugar
3 tablespoons flour
3 tablespoons cocoa
Dash of salt
2 cups milk, divided in half
2 tablespoons vanilla
Put dry ingredients into quart jar. Shake well. Add 1 cup mild, shake well again. Add vanilla and 1 cup milk, shake well. Pour into pot and cook about 7 minutes, stirring continually while cooking. Pour into baked pie shell (or graham cracker crust). Top with meringue; or cool and top with Cool Whip.

Stabilized Whipped Cream
¼ cup cold water
1 teaspoon unflavored gelatin
1 cup heavy whipping cream
1 tablespoon white sugar
½ teaspoon vanilla
1 teaspoon cinnamon
Chill mixing bowl and beaters for at least 15 minutes before using. Place water in a small microwave-safe bowl. Sprinkle gelatin over water and allow to soften for 5 minutes.
Dissolve gelatin by microwaving for 3 minutes, stirring after every minutes. Remove from microwave and let stand at room temperature for 10 minutes; gelatin must be liquid but not warm when added to cream.
Remove bowl and beaters from refrigerator and pour in cream, sugar, cinnamon and vanilla. Beat together just until beater marks begin to show distinctly. Add gelatin mixture to cream, pouring in a steady stream while beating constantly. Beat until stiff peaks form. Use immediately.
Enjoy with Love,
Christina

Thursday, April 8, 2010

Cookology's Baking Bootcamp #1: Pate Choux

There is a local hands-on cooking school that offers classes to the public. Cookology is located at the Dulles Town Center mall and ever since it opened I have wanted to take a class there. I just so happened to mention to the Easter Bunny that there was a baking bootcamp series coming up in the month of April, and the Easter Bunny decided to help me register! I was sooooo excited!

The instructor for the baking bootcamp is quite accomplished. Here is Brad Spates' bio according to the Cookology website:

"Brad studied at the Culinary Institute of America in Hyde Park, NY and the James Rumsey School of Culinary Arts. He learned his baking skills under some of the best pastry chef's in the world such as Master Chef Judeth Stains, CIA Award Winning Chef Steve Brown, and Steve Weiss, who was part of the 2000 National Gold Winning Pastry Arts Team and the Executive Pastry Chef of the Trump Taj Mahal and Caesars Palace in Las Vegas. He has travelled and studied pastries worldwide, including an in-depth study of French, Italian, and classical American Pastry. Bread specializes in unique forms of design, while using classical techniques that are practiced by very few modern chef's, such as pastillage, formed marzipan, pulled and blown sugar, and casting chocolates. He has a passion for baking and creating, and can't wait to share his talents with the students at Cookology!"

Impressive right!? I knew our first class was going to be about Pate Choux (pronouced like pat a shoe), which I had tried to make YEARS ago and had mild success. They promised a sweet and savory version.

The class started and we were put into pairs. I teamed up with a gal named Karen who seemed sweet and approached things in a similar fashion as I did (good match! *phew!*). I unintentionally stood next to Brad...which turned out to be good for my tendancy to get distracted...he kept my attention for sure!

The instruction was paced well, we were able to ask all the questions we wanted and had a great time. The recipes will follow later (he sends them out about a week after the class), but I can tell you that the end results were WONDERFUL! Yumm!! Just look at these photos:

My Savory Chees Puffs

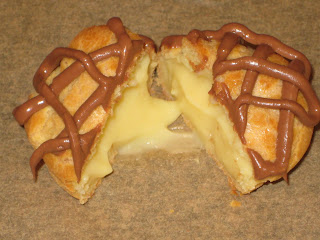
My Sweet Cream Filled Eclairs

Inside of the Yummy Eclairs (Held by Brad)

I certainly am looking forward to next week's class on pies and tartlets!

**Editted to add recipes:
Pate' choux

Ingredients
1 cup water
3/4 stick butter (6 tablespoons)
1 tablespoon sugar plus 1/8 teaspoon salt (for sweet)
1 teaspoon salt (for savory)
5 3/4 ounces flour
1 cup eggs, about 4 large eggs and 2 whites

Directions
Preheat oven to 425 degrees F.
Boil water, butter, and salt or sugar. Add flour and remove from heat. Work mixture together and return to heat. Continue working the mixture until all flour is incorporated and dough forms a ball. Transfer mixture into bowl of a standing mixer and let cool for 3 or 4 minutes. With mixer on stir or lowest speed add eggs, 1 at a time, making sure the first egg is completely incorporated before continuing. Once all eggs have been added and the mixture is smooth put dough into piping bag fitted with a round tip. Pipe immediately into golfball-size shapes, 2 inches apart onto parchment lined sheet pans. Cook for 10 minutes, then turn the oven down to 350 degrees F and bake for 10 more minutes or until golden brown. Once they are removed from the oven pierce with a paring knife immediately to release steam. Fill with pastry cream, whip cream, or pastry cream.

Pastry cream
Ingredients
2 cups milk
1/4 cup white sugar
2 egg yolks
1 egg
1/4 cup cornstarch
1/3 cup white sugar
2 tablespoons butter
1 teaspoon vanilla extract

Directions
In a heavy saucepan, stir together the milk and 1/4 cup of sugar. Bring to a boil over medium heat. In a medium bowl, whisk together the egg yolks and egg. Stir together the remaining sugar and cornstarch; then stir them into the egg until smooth. When the milk comes to a boil, drizzle it into the bowl in a thin stream while mixing so that you do not cook the eggs. Return the mixture to the saucepan, and slowly bring to a boil, stirring constantly so the eggs don' t curdle or scorch on the bottom.

When the mixture comes to a boil and thickens, remove from the heat. Stir in the butter and vanilla, mixing until the butter is completely blended in. Pour into a heat-proof container and place a piece of plastic wrap directly on the surface to prevent a skin from forming. Refrigerate until chilled before using.


Cheese Mixture (to use instead of Cream Mixure)
Bleu cheese
Brie cheese
Parmesean Cheese
Cream cheese
Mascarpone
Heavy cream

Mix all ingredients in equal proportions.
(Note: We used Bleu Cheese, Parmesean Cheese and Ricotta Cheese along with the cream for our "testers.")
Enjoy with Love,
Christina