

The August 2010 Daring Bakers’ challenge was hosted by Elissa of 17 and Baking. For the first time, The Daring Bakers partnered with Sugar High Fridays for a co-event and Elissa was the gracious hostess of both. Using the theme of beurre noisette, or browned butter, Elissa chose to challenge Daring Bakers to make a pound cake to be used in either a Baked Alaska or in Ice Cream Petit Fours. The sources for Elissa’s challenge were Gourmet magazine and David Lebovitz’s “The Perfect Scoop.”
I was so excited about this challenge. I'd always wanted to try my hand at brown butter, baked Alaska and petit fours! Alas, I failed....I didn't allow enough time in my schedule to complete this challenge. I did make the ice cream part needed, so I'll share that recipe with you along with what should have been an awesome challenge recipe. Maybe one day when I have a bit more free time (oye!), I'll attempt this challenge.
I made Butterfinger Ice Cream. It's a basic vanilla ice cream with chopped Butterfingers in it. Yumm....it's so good...
The Recipe:
Butterfinger Ice Cream
Adapted from Kitchen Aid's French Vanilla Ice Cream
2 1/2 cups (590 ml) half-and-half
8 egg yolks
1 cup (235 ml) sugar
2 1/2 cups (590 ml) whipping cream
4 teaspoons (20 ml) vanilla
1/8 teaspoon (.5 ml) salt
2-3 Butterfinger candy bars, chopped
In medium saucepan over medium heat, heat half-and-half until very hot but not boiling, stirring often. Remove from heat; set aside.
Place egg yolks and sugar in mixer bowl. Whip using a whisk attachment. Mix about 30 seconds, or until well blended and slightly thickened. Continuing, very gradually add half-and-half; mix until blended. Return half-and-half mixture to medium saucepan; cook over medium heat until small bubbles form around edge and mixture is steamy, stirring constantly. Do not boil. Transfer half-and-half mixture into large bowl; stir in whipping cream, vanilla, and salt. Cover and chill thoroughly, at least 8 hours.
Using a container with a spout, pour mixture into your prepared ice cream maker. Churn until desired consistency. Add in chopped Butterfinger candy during last 2-3 minutes of churning. Immediately transfer ice cream into serving dishes (soft serve consistency), or freeze in an airtight container.
Enjoy With Love,
Christina
PS...Here are the challenge recipes in case YOU want to give them a try. You can also visit The Daring Kitchen for more information and to see this challenge as completed by others.
Vanilla Ice Cream
1 cup (250ml) whole milk
A pinch of salt
3/4 cup (165g) sugar
1 vanilla bean, split lengthwise OR 2 teaspoons (10ml) pure vanilla extract
2 cups (500ml) heavy (approx 35% butterfat) cream
5 large egg yolks
1 teaspoon (5ml) pure vanilla extract
1. Heat the milk, salt, and sugar in a medium saucepan until the liquid steams. Scrape out the seeds of the vanilla bean with a paring knife and add to the milk, along with the bean pod. Cover, remove from heat, and let infuse for an hour. (If you do not have a vanilla bean, simply heat the milk, salt, and sugar in a medium saucepan until the liquid steams, then let cool to room temperature.)
2. Set up an ice bath by placing a 2-quart (2 litre) bowl inside a large bowl partially filled with water and ice. Put a strainer on top of the smaller bowl and pour in the cream.
3. In another bowl, lightly beat the egg yolks together. Reheat the milk in the medium saucepan until warmed, and then gradually pour ¼ cup warmed milk into the yolks, constantly whisking to keep the eggs from scrambling. Once the yolks are warmed, scrape the yolk and milk mixture back into the saucepan of warmed milk and cook over low heat. Stir constantly and scrape the bottom with a spatula until the mixture thickens into a custard which thinly coats the back of the spatula.
4. Strain the custard into the heavy cream and stir the mixture until cooled. Add the vanilla extract (1 teaspoon [5ml] if you are using a vanilla bean; 3 teaspoons [15ml] if you are not using a vanilla bean) and refrigerate until thoroughly chilled, preferably overnight.
5. Remove the vanilla bean and freeze in an ice cream maker. If you don’t have an ice cream maker, you can make it without a machine. See instructions from David Lebovitz: http://www.davidlebovitz.com/archives/2007/07/making_ice_crea_1.html
Brown Butter Pound Cake
19 tablespoons (9.5 oz) (275g) unsalted (sweet) butter
2 cups (200g) sifted cake flour (not self-rising; sift before measuring)
1 teaspoon (5g) baking powder
1/2 teaspoon (3g) salt
1/2 cup (110g) packed light brown sugar
1/3 (75g) cup granulated sugar
4 large eggs
1/2 teaspoon pure vanilla extract
1. Preheat the oven to 325°F/160°C and put a rack in the center. Butter and flour a 9”x9” (23cmx23cm) square pan.
2. Place the butter in a 10” (25cm) skillet over medium heat. Brown the butter until the milk solids are a dark chocolate brown and the butter smells nutty. (Don’t take your eyes off the butter in case it burns.) Pour into a shallow bowl and chill in the freezer until just congealed, 15-30 minutes.
3. Whisk together cake flour, baking powder, and salt.
4. Beat the brown butter, light brown sugar, and granulated sugar in an electric mixer until light and fluffy, about 2 minutes. Beat in the eggs one at a time, mixing well, and then the vanilla extract.
5. Stir in the flour mixture at low speed until just combined.
6. Scrape the batter into the greased and floured 9”x9” (23cmx23cm) square pan. Smooth the top with a rubber spatula and rap the pan on the counter. Bake until golden brown on top and when a toothpick inserted into the center comes out clean, about 25 minutes.
7. Cool in the pan 10 minutes. Run a knife along the edge and invert right-side-up onto a cooling rack to cool completely.
Chocolate Glaze (For the Ice Cream Petit Fours)
9 ounces (250g) dark chocolate, finely chopped
1 cup (250 ml) heavy (approx 35% butterfat) cream
1 1/2 tablespoons (32g) light corn syrup, Golden syrup, or agave nectar
2 teaspoons (10ml) vanilla extract
Stir the heavy cream and light corn syrup in a small saucepan over medium heat until it comes to a boil. Remove from heat and add the dark chocolate. Let sit 30 seconds, then stir to completely melt the chocolate. Stir in the vanilla and let cool until tepid before glazing the petit fours.
Meringue (For the Baked Alaska)
8 large egg whites
½ teaspoon (3g) cream of tartar
½ teaspoon (3g) salt
1 cup (220g) sugar
Beat the egg whites, cream of tartar, and salt on high speed in an electric mixer until soft peaks form. Beat in the sugar gradually in a slow stream until stiff peaks form.
Assembly Instructions – Ice Cream Petit Fours
1. Line a 9”x9” (23cmx23cm) pan with plastic wrap, so that no sides of the pan are exposed and so there is some extra plastic wrap hanging off the sides. Spread 1 ¾ to 2 cups (450ml to 500ml) ice cream into the pan. Cover with more plastic wrap and freeze several hours.
2. Once the brown butter pound cake has completely cooled, level the top with a cake leveler or a serrated knife. Then split the cake in half horizontally to form two thin layers.
3. Unwrap the frozen ice cream. Flip out onto one of the layers of cake and top with the second layer of cake. Wrap well in plastic wrap and return to the freezer overnight.
4. Make the chocolate glaze (see above.)
5. While the glaze cools, trim ¾” (2cm) off each side of the ice cream cake to leave a perfectly square 7.5” (19cm) ice cream cake. Cut the cake into twenty five petit fours, each 1.5”x1.5” (4cmx4cm).
6. Glaze the petit fours one at a time: place a petit four on a fork and spoon chocolate glaze over it.
7. Place the petit fours on a parchment-lined baking sheet and return to the freezer for one hour.
Assembly Instructions – Baked Alaska
1. Line four 4” (10cm) diameter tea cups with plastic wrap, so that plastic wrap covers all the sides and hangs over the edge. Fill to the top with ice cream. Cover the top with the overhanging plastic wrap and freeze for several hours, or until solid.
2. Level the top of the brown butter pound cake with a serrated knife or with a cake leveler. Cut out four 4” (10cm) diameter circles from the cake. Discard the scraps or use for another purpose.
3. Make the meringue (see above.)
4. Unwrap the ice cream “cups” and invert on top of a cake round. Trim any extra cake if necessary.
5. Pipe the meringue over the ice cream and cake, or smooth it over with a spatula, so that none of the ice cream or cake is exposed. Freeze for one hour or up to a day.
6. Burn the tips of the meringue with a cooking blow torch. Or, bake the meringue-topped Baked Alaska on a rimmed baking sheet in a 500°F/260°C oven for 5 minutes until lightly golden. Serve immediately.
Friday, August 27, 2010


Monday, August 23, 2010
Butterfinger Cookies and The Cookie Tin
Most of my family has always enjoyed sweets. Cookies reigned supreme...I think because they're quick, easy and can be snuck from the jar easily without getting caught.
Awhile back, my Auntie Jan C. and I shared a Cookie Tin. What's that you ask?! Well, it's a tin that we sent back and forth across the country to each other filled with our latest baking delights. We included the recipe so that the other person could easily recreate the goodie whenever they wanted. We also kept track of what was sent so that we didn't send duplicates. It was great fun. So much fun in fact, that I decided to revive the idea with my own niece, Jessica.
Jessica is turning into quite a baker/cook. She and her sisters helps my sister make cookies for lunches each week and I'm told they're wonderful. So, I approached Jessica with the idea of the Cookie Tin and we're off. I decided to get it started. I purchased the tin and then had to decide what kinds of cookies to send.
I decided on Butterfinger Cookies. They're pretty standard cookie-fare based on the ingredients, yet they have the added twist of a bit more brown sugar (which I have in bulk it seems!) and the delightful peanutty sweetness of Butterfingers. They turned out great and were a big hit with Jessica! I can't wait to get the filled tin back with her first creation!

PS...I'll include the "Cookie Tin Instructions" after the recipe for those that may want to start this idea with a loved one.
The Recipe:
Butterfinger Cookies
2 1/4 cups flour
1 teaspoon baking soda
1/2 teaspoon iodized salt
1/2 cup (1 stick) butter, melted, cooled
1 cup packed brown sugar
1/4 cup granulated sugar
1 teaspoon vanilla extract
2 eggs
1 cup chopped Butterfinger candy bars (about 8 “fun size” candy bars or 2-3 regular sized bars)
Preheat oven to 325 degrees. Line baking sheet with parchment paper (I used my Silpats). Set aside.
Sift together flour, baking soda and salt. Set aside.
In another bowl beat together butter, brown sugar and granulated sugar until creamy. Beat in vanilla. Beat in eggs 1 at a time. Slowly mix in dry ingredients until well combined. Fold in chopped Butterfingers.
Drop rounded teaspoonfuls onto prepared baking sheet. Cook 8-10 minutes or until edges start to brown and cookies are set. Allow to cool for 2 minutes on cookie sheet. Transfer to cooling rack to cool completely.
How the Cookie Tin works:
Christina
Awhile back, my Auntie Jan C. and I shared a Cookie Tin. What's that you ask?! Well, it's a tin that we sent back and forth across the country to each other filled with our latest baking delights. We included the recipe so that the other person could easily recreate the goodie whenever they wanted. We also kept track of what was sent so that we didn't send duplicates. It was great fun. So much fun in fact, that I decided to revive the idea with my own niece, Jessica.
Jessica is turning into quite a baker/cook. She and her sisters helps my sister make cookies for lunches each week and I'm told they're wonderful. So, I approached Jessica with the idea of the Cookie Tin and we're off. I decided to get it started. I purchased the tin and then had to decide what kinds of cookies to send.
I decided on Butterfinger Cookies. They're pretty standard cookie-fare based on the ingredients, yet they have the added twist of a bit more brown sugar (which I have in bulk it seems!) and the delightful peanutty sweetness of Butterfingers. They turned out great and were a big hit with Jessica! I can't wait to get the filled tin back with her first creation!

PS...I'll include the "Cookie Tin Instructions" after the recipe for those that may want to start this idea with a loved one.
The Recipe:
Butterfinger Cookies
2 1/4 cups flour
1 teaspoon baking soda
1/2 teaspoon iodized salt
1/2 cup (1 stick) butter, melted, cooled
1 cup packed brown sugar
1/4 cup granulated sugar
1 teaspoon vanilla extract
2 eggs
1 cup chopped Butterfinger candy bars (about 8 “fun size” candy bars or 2-3 regular sized bars)
Preheat oven to 325 degrees. Line baking sheet with parchment paper (I used my Silpats). Set aside.
Sift together flour, baking soda and salt. Set aside.
In another bowl beat together butter, brown sugar and granulated sugar until creamy. Beat in vanilla. Beat in eggs 1 at a time. Slowly mix in dry ingredients until well combined. Fold in chopped Butterfingers.
Drop rounded teaspoonfuls onto prepared baking sheet. Cook 8-10 minutes or until edges start to brown and cookies are set. Allow to cool for 2 minutes on cookie sheet. Transfer to cooling rack to cool completely.
- Each person will have the tin for approximately one month (or less) before they should send it back.
- Bake something that will ship well. Pack in the tin. (Remember that plastic baggies, parchment paper or wax paper are good to use to keep items fresh and separated. Also remember the temperature outside; chocolate doesn’t do well in the summer!)
- Write on the recipe log. Use your initials for the “who” part.
- Include the recipe for the item you are sending. It can be typed or hand-written.
- Ship to the other person!
Christina
Saturday, August 14, 2010
Daring Cooks: The World of Pierogi (August 2010)
The August 2010 Daring Cooks' Challenge was hosted by LizG of Bits n' Bites and Anula of Anula's Kitchen. They chose to challenge Daring Cooks to make pierogi from scratch and an optional challenge to provide one filling that best represents their locale.
So at first glance this challenge seemed a bit repetitive to me....much like when we made dumplings or potstickers. I wasn't overly excited about the filling choices either and didn't really have time to be overly creative. BUT, in the spirit of being a Daring Cook and wanting to participate, onward with the challenge!
Starting with the filing...I chose to make the Russian Style Pierogi. Sure it has cottage cheese in it which I'm not a huge fan of, but hey...it's cheese, it'll melt and be yummy right?! Besides...it has bacon!
The dough was pretty straight forward. Very stretchy when rolled though (again, very similar to the potsticker dough). I used the pierogi form (I found mine at Sur La Table) as a template to cut my circles. Easy enough...so onto filling. As I learned, more isn't always better in these situations and this held true. The pierogi forms are fairly unforgiving. The filling portion squeezes out the "bottom" and it difficult to get out of the form if you over fill, not to mention it doesn't squeeze together very well and "seal" the dough.

But, after a few tries I got the hang of it and realized that the recipe was going to make enough to feed an entire army....and their enemies! (Note: feel free to cut the thing in half, or even a quarter, unless you want to freeze them for later!)
The next step is to boil them. Also pretty straight forward, just remember to time them and flip them so that they cook evenly. This is also the step that you'll find out if you sealed them well enough or not. They explode pretty fast if you didn't. Makes for messy water, but not a big deal otherwise.

Verdict...they were ok like this. I wasn't a huge fan...and no, cottage cheese doesn't exactly melt and become the cheesy goodness I'd hoped for. So, the next step in trying to make them a bit better was to fry them. Also, hoping to speed up the process a bit, a large pierogi was formed and sealed using a fork. The result:
 This method increased the flavor content...much better, but then again, what isn't usually better fried! :-)
To see other Daring Cooks' creations, visit: The Daring Kitchen.
The Recipes:
Cottage Cheese Wareneki (Pierogi)
Adapted from The Mennonite Cookbook
Dough Ingredients:
½ cup (125 ml) milk (can be whole milk, 2% or skim milk)
½ cup (125 ml) whipping cream
3 large egg whites
1 tsp (5 ml) salt
3 cups (450 gm) all-purpose flour
Directions:
1. Mix flour and salt, add other ingredients, and knead dough until you have a smooth dough. (I kneaded this dough quite a bit, and it yielded a nice, pliable dough).
2. On a floured surface roll out fairly thin (1/8” or about 3 millimeters), cut into 2” (5 cm) squares, and fill with 1 tsp (5ml) cottage cheese filling (see below).
Cottage Cheese Wareneki Filling Ingredients:
Traditional
1 lb (455 g) dry cottage cheese
3 large egg yolks
Salt to taste
Directions:
1. Mix well all the ingredients for the filling.
2. Put 1 rounded teaspoon (5 ml) of the filling in each square, fold corners to form a triangle, seal edges well using your fingers or a fork
3. Cook in salted, boiling water for 5 minutes.
Note: Boiled pierogi can also be fried after boiling for a nice crunchy dumpling.
Note: If you can't find dry cottage cheese, simply drain normal cottage cheese by nesting the cottage in a few layers of cheese cloth or a fine sieve over a bowl.
Note: You can very easy make a sweet version of Warenki - just add some fruits and sugar to the cheese filling and mix well together (strawberries or blueberries are great idea!)
Russian Style Pierogi
Makes 4 generous servings, around 30 dumplings Traditional Polish recipe, although each family will have their own version, this is Anula's family recipe
Dough Ingredients:
2 to 2 1/2 cups (300 to 375 g) all-purpose (plain) flour
1 large egg
1 teaspoon (5 ml) salt
About 1 cup (250 ml) lukewarm water
Filling Ingredients:
3 big potatoes, cooked & mashed (1 1/2 cup instant or leftover mashed potatoes is fine too)
1 cup (225 g) cottage cheese, drained
1 onion, diced & sauteed in butter until clear
3 slices of streaky bacon, diced and fried till crispy (you can add more bacon if you like or omit that part completely if you're vegetarian)
1 egg yolk (from medium egg)
1 tablespoon (15 g) butter, melted
1/4 (1.25 ml) teaspoon salt pinch of pepper to taste
Directions:
1. Combine all the ingredients for the filling (it's best to use one's hands to do that) put into the bowl, cover and set aside in the fridge until you have to use it.
2. Place 2 cups flour in a large bowl or on a work surface and make a well in the center. Break the egg into it, add the salt and a little lukewarm at a time (in my situation 1/2 cup was enough). Bring the dough together, kneading well and adding more flour or water as necessary. Cover the dough with a bowl or towel. You‟re aiming for soft dough. Let it rest 20 minutes.
3. On a floured work surface, roll the dough out thinly (1/8” or about 3 millimeters) cut with a 2-inch (5 cm) round or glass. Spoon a portion (teaspoon will be the best) of the filling into the middle of each circle. Fold dough in half and pinch edges together. Gather scraps, re-roll and fill. Repeat with remaining dough.
4. Bring a large, low saucepan of salted water to boil. Drop in the pierogi, not too many, only single layer in the pan! Return to the boil and reduce heat. When the pierogi rise to the surface, continue to simmer a few minutes more ( usually about 5 minutes). Remove one dumpling with a slotted spoon and taste if ready. When satisfied, remove remaining pierogi from the water.
5. Serve immediately preferably with crème fraiche or fry. Cold pierogi can be fried. Boiled Russian pierogi can be easily frozen and boiled taken out straight from the freezer.
Other types of fillings:
Potato and Cheese Filling
Ingredients: 4 – 5 (600g – 750g) boiled potatoes 4 table spoons butter (60 g) or olive oil (60 ml) 3 tablespoons + 1 teaspoon (50 ml) milk 1 egg white (from medium egg) ½ cup (about 120 ml) farmers‟ cheese ( or any unripened cheese like Indian Paneer) salt and pepper to taste
Directions:
1. Combine ingredients thoroughly.
2. Fill pierogi as instructed above.
Meat and Cabbage Filling
Ingredients: 200 g (7 oz) cooked meat (minced or cut very finely) 500 g (18 oz) white cabbage (chopped and simmered in a little bit of water, until soft) 1 onion (diced and fried) 1 whole medium egg 1 tablespoon (15g) butter dry breadcrumbs (add as much to hold the filling together, about 2 tablespoons) salt and pepper to taste
Directions:
1. Combine ingredients thoroughly.
2. Fill pierogi as instructed above.
Soy bean Filling
Ingredients: 350 g (12 oz.) soy beans (canned, drained and minced) 2 medium eggs 1 onion (diced and fried) 100 g (2/3 cup) dry breadcrumbs salt and pepper
Directions:
1. Combine ingredients thoroughly.
2. Fill pierogi as instructed above.
Sauerkraut Filling
Ingredients: 2 cups (500 g) sauerkraut 1 big carrot, grated 1 shallot, chopped and fried with a tablespoon of butter few (about 3) wild mushrooms (I used dry ones, you can use fresh but chop them and fry on some butter before adding to the sauerkraut cabbage) salt, pepper and cumin to taste.
Directions
1. Sauté all the ingredients together until soft, cool before filling pierogi.
2. Fill pierogi as instructed above.
Seasonal Fruits
You can also fill pierogi with whole seasonal fruits for example- strawberries, blueberries, morels, grated apples etc. To prevent the fruits from „sogging‟ just add a little bit of potato flour inside with the fruit and sweeten them after the boiling on the plate rather than putting sugar inside.
Enjoy With Love,
Christina
So at first glance this challenge seemed a bit repetitive to me....much like when we made dumplings or potstickers. I wasn't overly excited about the filling choices either and didn't really have time to be overly creative. BUT, in the spirit of being a Daring Cook and wanting to participate, onward with the challenge!
Starting with the filing...I chose to make the Russian Style Pierogi. Sure it has cottage cheese in it which I'm not a huge fan of, but hey...it's cheese, it'll melt and be yummy right?! Besides...it has bacon!
The dough was pretty straight forward. Very stretchy when rolled though (again, very similar to the potsticker dough). I used the pierogi form (I found mine at Sur La Table) as a template to cut my circles. Easy enough...so onto filling. As I learned, more isn't always better in these situations and this held true. The pierogi forms are fairly unforgiving. The filling portion squeezes out the "bottom" and it difficult to get out of the form if you over fill, not to mention it doesn't squeeze together very well and "seal" the dough.

But, after a few tries I got the hang of it and realized that the recipe was going to make enough to feed an entire army....and their enemies! (Note: feel free to cut the thing in half, or even a quarter, unless you want to freeze them for later!)
The next step is to boil them. Also pretty straight forward, just remember to time them and flip them so that they cook evenly. This is also the step that you'll find out if you sealed them well enough or not. They explode pretty fast if you didn't. Makes for messy water, but not a big deal otherwise.

Verdict...they were ok like this. I wasn't a huge fan...and no, cottage cheese doesn't exactly melt and become the cheesy goodness I'd hoped for. So, the next step in trying to make them a bit better was to fry them. Also, hoping to speed up the process a bit, a large pierogi was formed and sealed using a fork. The result:

To see other Daring Cooks' creations, visit: The Daring Kitchen.
Special thanks to Neil for helping me out with this challenge!
The Recipes:
Cottage Cheese Wareneki (Pierogi)
Adapted from The Mennonite Cookbook
Dough Ingredients:
½ cup (125 ml) milk (can be whole milk, 2% or skim milk)
½ cup (125 ml) whipping cream
3 large egg whites
1 tsp (5 ml) salt
3 cups (450 gm) all-purpose flour
Directions:
1. Mix flour and salt, add other ingredients, and knead dough until you have a smooth dough. (I kneaded this dough quite a bit, and it yielded a nice, pliable dough).
2. On a floured surface roll out fairly thin (1/8” or about 3 millimeters), cut into 2” (5 cm) squares, and fill with 1 tsp (5ml) cottage cheese filling (see below).
Cottage Cheese Wareneki Filling Ingredients:
Traditional
1 lb (455 g) dry cottage cheese
3 large egg yolks
Salt to taste
Directions:
1. Mix well all the ingredients for the filling.
2. Put 1 rounded teaspoon (5 ml) of the filling in each square, fold corners to form a triangle, seal edges well using your fingers or a fork
3. Cook in salted, boiling water for 5 minutes.
Note: Boiled pierogi can also be fried after boiling for a nice crunchy dumpling.
Note: If you can't find dry cottage cheese, simply drain normal cottage cheese by nesting the cottage in a few layers of cheese cloth or a fine sieve over a bowl.
Note: You can very easy make a sweet version of Warenki - just add some fruits and sugar to the cheese filling and mix well together (strawberries or blueberries are great idea!)
Russian Style Pierogi
Makes 4 generous servings, around 30 dumplings Traditional Polish recipe, although each family will have their own version, this is Anula's family recipe
Dough Ingredients:
2 to 2 1/2 cups (300 to 375 g) all-purpose (plain) flour
1 large egg
1 teaspoon (5 ml) salt
About 1 cup (250 ml) lukewarm water
Filling Ingredients:
3 big potatoes, cooked & mashed (1 1/2 cup instant or leftover mashed potatoes is fine too)
1 cup (225 g) cottage cheese, drained
1 onion, diced & sauteed in butter until clear
3 slices of streaky bacon, diced and fried till crispy (you can add more bacon if you like or omit that part completely if you're vegetarian)
1 egg yolk (from medium egg)
1 tablespoon (15 g) butter, melted
1/4 (1.25 ml) teaspoon salt pinch of pepper to taste
Directions:
1. Combine all the ingredients for the filling (it's best to use one's hands to do that) put into the bowl, cover and set aside in the fridge until you have to use it.
2. Place 2 cups flour in a large bowl or on a work surface and make a well in the center. Break the egg into it, add the salt and a little lukewarm at a time (in my situation 1/2 cup was enough). Bring the dough together, kneading well and adding more flour or water as necessary. Cover the dough with a bowl or towel. You‟re aiming for soft dough. Let it rest 20 minutes.
3. On a floured work surface, roll the dough out thinly (1/8” or about 3 millimeters) cut with a 2-inch (5 cm) round or glass. Spoon a portion (teaspoon will be the best) of the filling into the middle of each circle. Fold dough in half and pinch edges together. Gather scraps, re-roll and fill. Repeat with remaining dough.
4. Bring a large, low saucepan of salted water to boil. Drop in the pierogi, not too many, only single layer in the pan! Return to the boil and reduce heat. When the pierogi rise to the surface, continue to simmer a few minutes more ( usually about 5 minutes). Remove one dumpling with a slotted spoon and taste if ready. When satisfied, remove remaining pierogi from the water.
5. Serve immediately preferably with crème fraiche or fry. Cold pierogi can be fried. Boiled Russian pierogi can be easily frozen and boiled taken out straight from the freezer.
Other types of fillings:
Potato and Cheese Filling
Ingredients: 4 – 5 (600g – 750g) boiled potatoes 4 table spoons butter (60 g) or olive oil (60 ml) 3 tablespoons + 1 teaspoon (50 ml) milk 1 egg white (from medium egg) ½ cup (about 120 ml) farmers‟ cheese ( or any unripened cheese like Indian Paneer) salt and pepper to taste
Directions:
1. Combine ingredients thoroughly.
2. Fill pierogi as instructed above.
Meat and Cabbage Filling
Ingredients: 200 g (7 oz) cooked meat (minced or cut very finely) 500 g (18 oz) white cabbage (chopped and simmered in a little bit of water, until soft) 1 onion (diced and fried) 1 whole medium egg 1 tablespoon (15g) butter dry breadcrumbs (add as much to hold the filling together, about 2 tablespoons) salt and pepper to taste
Directions:
1. Combine ingredients thoroughly.
2. Fill pierogi as instructed above.
Soy bean Filling
Ingredients: 350 g (12 oz.) soy beans (canned, drained and minced) 2 medium eggs 1 onion (diced and fried) 100 g (2/3 cup) dry breadcrumbs salt and pepper
Directions:
1. Combine ingredients thoroughly.
2. Fill pierogi as instructed above.
Sauerkraut Filling
Ingredients: 2 cups (500 g) sauerkraut 1 big carrot, grated 1 shallot, chopped and fried with a tablespoon of butter few (about 3) wild mushrooms (I used dry ones, you can use fresh but chop them and fry on some butter before adding to the sauerkraut cabbage) salt, pepper and cumin to taste.
Directions
1. Sauté all the ingredients together until soft, cool before filling pierogi.
2. Fill pierogi as instructed above.
Seasonal Fruits
You can also fill pierogi with whole seasonal fruits for example- strawberries, blueberries, morels, grated apples etc. To prevent the fruits from „sogging‟ just add a little bit of potato flour inside with the fruit and sweeten them after the boiling on the plate rather than putting sugar inside.
Enjoy With Love,
Christina
Tuesday, July 27, 2010
Daring Bakers: Swiss Swirl Ice Cream Cake (August 2010)
The July 2010 Daring Bakers’ challenge was hosted by Sunita of Sunita’s world – life and food. Sunita challenged everyone to make an ice-cream filled Swiss roll that’s then used to make a bombe with hot fudge. Her recipe is based on an ice cream cake recipe from Taste of Home.
I apologize in advance, this blog post will be short…lots going on this summer!
This recipe seemed like a fun one to try to beat the dog days of summer. It took a bit of planning ahead because of the two different types of ice creams. I’ve made lots of ice creams before so the hardest part on those was deciding what flavors to use. I finally settled on Butter Pecan and Pistachio. Both were yummy on their own, though the butter pecan’s texture was a bit icier than I’d had liked and the pistachio had a bit of an odd aftertaste (maybe just me?!). Both worked well for the end product though.
The part that had me the most nervous were the swiss rolls. I was nervous because I have such lousy luck with “rolls.” I’ve tried pumpkin rolls and buche de noel (those fun chocolate logs at Christmas) with little to no success. I’m not sure what I do wrong, but I think it may have something to do with the towel or cooling process (any tips?!).
This cake “roll” was not much different except that I pressed on. I followed the recipe to the letter, even went out and purchased the exact size pan recommended. My cakes first stuck a bit to the pan (ok, so I did forget to use parchment), then when I unrolled them they cracked like they always do…:::SIGH::: Like I said though, I pressed on and filled them with the whipped cream anyway (which, is divine!! USE THE FULL VANILLA BEAN!).
I decided that the best way to cut things from the freezer (the frozen swiss rolls, end product) is with an electric knife….such clean, quick work! :-) The assembly was easy, though a bit time consuming (waiting for each step to freeze before moving to the next). So again, plan ahead.
Overall, this recipe was a challenge (the rolls still beat me I feel), but it was a fun way to have an ice cream cake. Personally, I think I’d use the store bought stuff in a pinch…Little Debbie does a wonderful roll and some of those store bought ice creams are great…though my homemade ones are pretty good too.
To see other Daring Bakers' creations and get a downloadable PDF of the recipes, visit: The Daring Kitchen
Enjoy!
Swiss Roll Ice Cream Cake
(Inspired by the recipe of the same name from the Taste of Home website)
The Swiss Rolls:
Preparation time: 10 minutes
Baking time: 10 - 12 minutes
Rolling and cooling time: at least 30 minutes
Filling: 5 - 8 minutes
Filling and rolling: 5 - 10 minutes
Ingredients:
6 medium sized eggs
1 C / 225 grams caster sugar /8 oz + extra for rolling
6 TBS. / 45 grams/ a pinch over 1.5 oz of all purpose (plain) flour + 5 TBS. /40 gram / a pinch under 1.5 oz of natural unsweetened cocoa powder, sifted together
2 TBS. /30 ml / 1 fl oz of boiling water
a little oil for brushing the pans
For the filling:
2 C / 500 mls/ 16 fl oz of whipping cream
1 vanilla pod, cut into small pieces of about ½ cm (or 1 tsp vanilla extract)
5 TBS. / 70 grams / 2.5oz of caster sugar
Directions:
Pre-heat the oven at 200 deg C /400 deg F approximately. Brush the baking pans (11 inches by 9 inches) with a little oil and line with greaseproof baking paper. If you have just one pan, bake one cake and then let the pan cool completely before using it for the next cake.
In a large mixing bowl, add the eggs and sugar and beat till very thick; when the beaters are lifted, it should leave a trail on the surface for at least 10 seconds.
Add the flour mixture, in three batches and fold in gently with a spatula. Fold in the water.
Divide the mixture among the two baking pans and spread it out evenly, into the corners of the pans.
Place a pan in the center of the pre-heated oven and bake for about 10-12 minutes or till the center is springy to the touch.
Spread a kitchen towel on the counter and sprinkle a little caster sugar over it.
Turn the cake on to the towel and peel away the baking paper. Trim any crisp edges.
Starting from one of the shorter sides, start to make a roll with the towel going inside. Cool the wrapped roll on a rack, seam side down.
Repeat the same for the next cake as well.
Grind together the vanilla pieces and sugar in a food processer till nicely mixed together. If you are using vanilla extract, just grind the sugar on its own and then add the sugar and extract to the cream.
In a large bowl, add the cream and vanilla-sugar mixture and beat till very thick.
Divide the cream mixture between the completely cooled cakes.
Open the rolls and spread the cream mixture, making sure it does not go right to the edges (a border of ½ an inch should be fine).
Roll the cakes up again, this time without the towel. Wrap in plastic wrap and chill in the fridge till needed, seam side down.
Vanilla Ice Cream
Preparation time: 5 minutes + freezing
Ingredients
2 and ½ C / 625 ml / 20 fl oz of whipping cream
1 vanilla bean, minced or 1 tsp/ 5 ml/ .15 fl oz vanilla extract
½ C / 115grams/ 4 oz of granulated sugar
Directions:
Grind together the sugar and vanilla in a food processor. In a mixing bowl, add the cream and vanilla –sugar mixture and whisk lightly till everything is mixed together. If you are using the vanilla extract, grind the sugar on its own and then and the sugar along with the vanilla extract to the cream.
Pour into a freezer friendly container and freeze till firm around the edges. Remove from the freezer, beat till smooth and return to the freezer. Do this 3-4 times and then set completely.
Hot Fudge Sauce
Preparation time: 2 minutes
Cooking time: 2 minutes
Ingredients:
1 C / 230 grams / 8 oz of caster sugar
3 TBS. / 24 grams /1.5 oz of natural unsweetened cocoa powder
2 TBS. /15 grams / 1 oz of corn flour/cornstarch
1 ½ C / 355 ml /12 fl oz of water
1 TBS. /14 grams/ 1 oz butter
1 tsp/ 5 ml / .15 fl oz vanilla extract
Directions:
In a small saucepan, whisk together the sugar, cocoa powder, corn flour and water.
Place the pan over heat, and stir constantly, till it begins to thicken and is smooth (for about 2 minutes).
Remove from heat and mix in the butter and vanilla. Keep aside to cool.
Chocolate Ice Cream
Preparation time: 5 minutes + freezing
Ingredients:
2 C / 500 ml whipping cream
1 C / 230 grams / 8 oz caster sugar
3 TBS. / 24 grams / 1.5 oz of natural unsweetened cocoa powder
Directions:
Grind together the sugar and the cocoa powder in a food processor.
In a saucepan, add all the ingredients and whisk lightly.
Place the pan over heat and keep stirring till it begins to bubble around the edges.
Remove from heat and cool completely before transferring to a freezer friendly container till firm around the edges. If you are using an ice cream maker, churn the ice cream according to the manufacturer’s instruction, after the mixture has cooled completely.
Remove from the freezer, beat till smooth and return to the freezer. Do this 3-4 times and then set completely.
Swiss Roll Ice Cream Cake Assembly:
Cut the Swiss rolls into 20 equal slices (approximately 2 cms each).
Cover the bottom and sides of the bowl in which you are going to set the dessert with cling film/plastic wrap.
Arrange two slices at the bottom of the pan, with their seam sides facing each other. Arrange the Swiss roll slices up the bowl, with the seam sides facing away from the bottom, to cover the sides of the bowl. Cover the bowl with plastic wrap and freeze till the slices are firm (at least 30 minutes).
Soften the vanilla ice cream. Take the bowl out of the freezer, remove the cling film cover and add the ice cream on top of the cake slices. Spread it out to cover the bottom and sides of the bowl. Cover the bowl with plastic wrap and freeze till firm (at least 1 hour).
Add the fudge sauce over the vanilla ice cream, cover and freeze till firm. (at least an hour).
Soften the chocolate ice cream and spread it over the fudge sauce. Cover with plastic wrap and freeze for at least 4-5 hours till completely set.
Remove the plastic cover, and place the serving plate on top of the bowl. Turn it upside down and remove the bowl and the plastic lining. If the bowl does not come away easily, wipe the outsides of the bowl with a kitchen towel dampened with hot water. The bowl will come away easily.
Keep the cake out of the freezer for at least 10 minutes before slicing, depending on how hot your region is. Slice with a sharp knife, dipped in hot water.
Ice Creams I Used (From Foodnetwork.com):
Butter Pecan
Ingredients
1 tablespoon unsalted butter
2/3 cup chopped pecans
1 (13-ounce) can evaporated milk
1 (3 3/4-ounce) package instant French vanilla pudding mix
1 cup sugar
1 teaspoon vanilla extract
3 cups whole milk
Directions
Melt the butter in a small saucepan. Cook the pecans over low heat until they are lightly browned, about 3 minutes. Place on a paper towel to drain and cool. In an 8-cup measuring cup with a spout, combine the remaining ingredients. Whisk until the sugar is dissolved. Pour the mixture into an ice cream maker and freeze according to manufacturers' instructions. Add the pecans 10 minutes into the freezing.
Pistachio Ice Cream
Ingredients
1 cup unsalted shelled pistachios
1 cup sugar
2 cups milk (do not use low-fat or nonfat)
3 cups heavy cream
12 large egg yolks
1/2 teaspoon almond extract
Directions
Finely grind 1 cup of the pistachios and 1/2 cup of the sugar in a food processor, being careful not to turn the mixture into butter. Bring the milk and cream to a boil in heavy large saucepan. Remove from heat.
Combine the egg yolks and remaining 1/2-cup sugar in a mixing bowl and whisk to blend. Gradually whisk 1 cup of the hot milk mixture into the eggs. Gradually add the egg mixture in a slow, steady stream into the hot cream in the saucepan. Cook over low heat, stirring occasionally, until the custard thickens enough to coat the back of a spoon and reaches 170 degrees on an instant-read thermometer, about 6 minutes.
Remove from the heat and strain into a large bowl. Add pistachio mixture and almond extract. Cover with plastic wrap, pressing down against the surface to keep a skin from forming, and chill in the refrigerator for at least 2 hours.
Remove from the refrigerator and pour into the bowl of an ice cream machine. Freeze according to the manufacturer's instructions. After the ice cream is made, transfer to an airtight container and freeze until ready to serve.
Enjoy With Love,
Christina
I apologize in advance, this blog post will be short…lots going on this summer!
This recipe seemed like a fun one to try to beat the dog days of summer. It took a bit of planning ahead because of the two different types of ice creams. I’ve made lots of ice creams before so the hardest part on those was deciding what flavors to use. I finally settled on Butter Pecan and Pistachio. Both were yummy on their own, though the butter pecan’s texture was a bit icier than I’d had liked and the pistachio had a bit of an odd aftertaste (maybe just me?!). Both worked well for the end product though.
The part that had me the most nervous were the swiss rolls. I was nervous because I have such lousy luck with “rolls.” I’ve tried pumpkin rolls and buche de noel (those fun chocolate logs at Christmas) with little to no success. I’m not sure what I do wrong, but I think it may have something to do with the towel or cooling process (any tips?!).
This cake “roll” was not much different except that I pressed on. I followed the recipe to the letter, even went out and purchased the exact size pan recommended. My cakes first stuck a bit to the pan (ok, so I did forget to use parchment), then when I unrolled them they cracked like they always do…:::SIGH::: Like I said though, I pressed on and filled them with the whipped cream anyway (which, is divine!! USE THE FULL VANILLA BEAN!).
I decided that the best way to cut things from the freezer (the frozen swiss rolls, end product) is with an electric knife….such clean, quick work! :-) The assembly was easy, though a bit time consuming (waiting for each step to freeze before moving to the next). So again, plan ahead.
Overall, this recipe was a challenge (the rolls still beat me I feel), but it was a fun way to have an ice cream cake. Personally, I think I’d use the store bought stuff in a pinch…Little Debbie does a wonderful roll and some of those store bought ice creams are great…though my homemade ones are pretty good too.
To see other Daring Bakers' creations and get a downloadable PDF of the recipes, visit: The Daring Kitchen
Enjoy!
.JPG) |
| The Glamour Shot! |
(Inspired by the recipe of the same name from the Taste of Home website)
The Swiss Rolls:
Preparation time: 10 minutes
Baking time: 10 - 12 minutes
Rolling and cooling time: at least 30 minutes
Filling: 5 - 8 minutes
Filling and rolling: 5 - 10 minutes
Ingredients:
6 medium sized eggs
1 C / 225 grams caster sugar /8 oz + extra for rolling
6 TBS. / 45 grams/ a pinch over 1.5 oz of all purpose (plain) flour + 5 TBS. /40 gram / a pinch under 1.5 oz of natural unsweetened cocoa powder, sifted together
2 TBS. /30 ml / 1 fl oz of boiling water
a little oil for brushing the pans
For the filling:
2 C / 500 mls/ 16 fl oz of whipping cream
1 vanilla pod, cut into small pieces of about ½ cm (or 1 tsp vanilla extract)
5 TBS. / 70 grams / 2.5oz of caster sugar
Directions:
Pre-heat the oven at 200 deg C /400 deg F approximately. Brush the baking pans (11 inches by 9 inches) with a little oil and line with greaseproof baking paper. If you have just one pan, bake one cake and then let the pan cool completely before using it for the next cake.
In a large mixing bowl, add the eggs and sugar and beat till very thick; when the beaters are lifted, it should leave a trail on the surface for at least 10 seconds.
Add the flour mixture, in three batches and fold in gently with a spatula. Fold in the water.
Divide the mixture among the two baking pans and spread it out evenly, into the corners of the pans.
Place a pan in the center of the pre-heated oven and bake for about 10-12 minutes or till the center is springy to the touch.
Spread a kitchen towel on the counter and sprinkle a little caster sugar over it.
Turn the cake on to the towel and peel away the baking paper. Trim any crisp edges.
Starting from one of the shorter sides, start to make a roll with the towel going inside. Cool the wrapped roll on a rack, seam side down.
Repeat the same for the next cake as well.
Grind together the vanilla pieces and sugar in a food processer till nicely mixed together. If you are using vanilla extract, just grind the sugar on its own and then add the sugar and extract to the cream.
In a large bowl, add the cream and vanilla-sugar mixture and beat till very thick.
Divide the cream mixture between the completely cooled cakes.
Open the rolls and spread the cream mixture, making sure it does not go right to the edges (a border of ½ an inch should be fine).
Roll the cakes up again, this time without the towel. Wrap in plastic wrap and chill in the fridge till needed, seam side down.
Vanilla Ice Cream
Preparation time: 5 minutes + freezing
Ingredients
2 and ½ C / 625 ml / 20 fl oz of whipping cream
1 vanilla bean, minced or 1 tsp/ 5 ml/ .15 fl oz vanilla extract
½ C / 115grams/ 4 oz of granulated sugar
Directions:
Grind together the sugar and vanilla in a food processor. In a mixing bowl, add the cream and vanilla –sugar mixture and whisk lightly till everything is mixed together. If you are using the vanilla extract, grind the sugar on its own and then and the sugar along with the vanilla extract to the cream.
Pour into a freezer friendly container and freeze till firm around the edges. Remove from the freezer, beat till smooth and return to the freezer. Do this 3-4 times and then set completely.
Hot Fudge Sauce
Preparation time: 2 minutes
Cooking time: 2 minutes
Ingredients:
1 C / 230 grams / 8 oz of caster sugar
3 TBS. / 24 grams /1.5 oz of natural unsweetened cocoa powder
2 TBS. /15 grams / 1 oz of corn flour/cornstarch
1 ½ C / 355 ml /12 fl oz of water
1 TBS. /14 grams/ 1 oz butter
1 tsp/ 5 ml / .15 fl oz vanilla extract
Directions:
In a small saucepan, whisk together the sugar, cocoa powder, corn flour and water.
Place the pan over heat, and stir constantly, till it begins to thicken and is smooth (for about 2 minutes).
Remove from heat and mix in the butter and vanilla. Keep aside to cool.
Chocolate Ice Cream
Preparation time: 5 minutes + freezing
Ingredients:
2 C / 500 ml whipping cream
1 C / 230 grams / 8 oz caster sugar
3 TBS. / 24 grams / 1.5 oz of natural unsweetened cocoa powder
Directions:
Grind together the sugar and the cocoa powder in a food processor.
In a saucepan, add all the ingredients and whisk lightly.
Place the pan over heat and keep stirring till it begins to bubble around the edges.
Remove from heat and cool completely before transferring to a freezer friendly container till firm around the edges. If you are using an ice cream maker, churn the ice cream according to the manufacturer’s instruction, after the mixture has cooled completely.
Remove from the freezer, beat till smooth and return to the freezer. Do this 3-4 times and then set completely.
Swiss Roll Ice Cream Cake Assembly:
Cut the Swiss rolls into 20 equal slices (approximately 2 cms each).
Cover the bottom and sides of the bowl in which you are going to set the dessert with cling film/plastic wrap.
Arrange two slices at the bottom of the pan, with their seam sides facing each other. Arrange the Swiss roll slices up the bowl, with the seam sides facing away from the bottom, to cover the sides of the bowl. Cover the bowl with plastic wrap and freeze till the slices are firm (at least 30 minutes).
Soften the vanilla ice cream. Take the bowl out of the freezer, remove the cling film cover and add the ice cream on top of the cake slices. Spread it out to cover the bottom and sides of the bowl. Cover the bowl with plastic wrap and freeze till firm (at least 1 hour).
Add the fudge sauce over the vanilla ice cream, cover and freeze till firm. (at least an hour).
Soften the chocolate ice cream and spread it over the fudge sauce. Cover with plastic wrap and freeze for at least 4-5 hours till completely set.
Remove the plastic cover, and place the serving plate on top of the bowl. Turn it upside down and remove the bowl and the plastic lining. If the bowl does not come away easily, wipe the outsides of the bowl with a kitchen towel dampened with hot water. The bowl will come away easily.
Keep the cake out of the freezer for at least 10 minutes before slicing, depending on how hot your region is. Slice with a sharp knife, dipped in hot water.
Ice Creams I Used (From Foodnetwork.com):
Butter Pecan
Ingredients
1 tablespoon unsalted butter
2/3 cup chopped pecans
1 (13-ounce) can evaporated milk
1 (3 3/4-ounce) package instant French vanilla pudding mix
1 cup sugar
1 teaspoon vanilla extract
3 cups whole milk
Directions
Melt the butter in a small saucepan. Cook the pecans over low heat until they are lightly browned, about 3 minutes. Place on a paper towel to drain and cool. In an 8-cup measuring cup with a spout, combine the remaining ingredients. Whisk until the sugar is dissolved. Pour the mixture into an ice cream maker and freeze according to manufacturers' instructions. Add the pecans 10 minutes into the freezing.
Pistachio Ice Cream
Ingredients
1 cup unsalted shelled pistachios
1 cup sugar
2 cups milk (do not use low-fat or nonfat)
3 cups heavy cream
12 large egg yolks
1/2 teaspoon almond extract
Directions
Finely grind 1 cup of the pistachios and 1/2 cup of the sugar in a food processor, being careful not to turn the mixture into butter. Bring the milk and cream to a boil in heavy large saucepan. Remove from heat.
Combine the egg yolks and remaining 1/2-cup sugar in a mixing bowl and whisk to blend. Gradually whisk 1 cup of the hot milk mixture into the eggs. Gradually add the egg mixture in a slow, steady stream into the hot cream in the saucepan. Cook over low heat, stirring occasionally, until the custard thickens enough to coat the back of a spoon and reaches 170 degrees on an instant-read thermometer, about 6 minutes.
Remove from the heat and strain into a large bowl. Add pistachio mixture and almond extract. Cover with plastic wrap, pressing down against the surface to keep a skin from forming, and chill in the refrigerator for at least 2 hours.
Remove from the refrigerator and pour into the bowl of an ice cream machine. Freeze according to the manufacturer's instructions. After the ice cream is made, transfer to an airtight container and freeze until ready to serve.
Enjoy With Love,
Christina
Wednesday, July 14, 2010
Daring Cooks: Nut Butters (July 2010)
The July 2010 Daring Cooks’ Challenge was hosted by Margie of More Please and Natashya of Living in the Kitchen with Puppies. They chose to challenge Daring Cooks to make their own nut butter from scratch, and use the nut butter in a recipe. Their sources include Better with Nut Butter by Cooking Light Magazine, Asian Noodles by Nina Simonds, and Food Network online.
According to Margie and Natashya, “Nutrition research suggests that nuts are good for your health. Nut butters, or pureed nuts, make it easy to use nuts in cooking. Although peanut butter is a staple in North America, most popular as the star ingredient in peanut butter and jelly sandwiches and beloved in peanut butter cookies and other sweets, it's seldom used in preparing savory dishes. Nut butters -- including not only peanut butter but almond, cashew, and walnut butters -- are common ingredients in many Asian and African countries, used in a wide array of savory dishes. Nut butters add complex & interesting flavors to dishes, provide body & thickness to sauces, and can be used to replace the dairy fats or other oils in recipes.”
The challenge this month was made a bit more interesting by requiring that we use our nut butters in a savory recipe. Margie and Natashya gave us a few recommendations and I chose to use the one for Chicken with Pecan Cream & Mushrooms.
The recipe is supposed to take 30 minutes start to finish and seemed to include ingredients that were normal and easy to deal with. The nut butter came together very easy. The food processor did all the work! The rest of the dish also seemed to come together fairly easy, though I have trouble cooking meat of any kind on the stovetop without setting off the fire alarms, turning on fans and opening doors (Did my mom teach me this method?! Love you mom!).
I doubled the cream/sauce recipe because I like my dishes to be saucy. Cooking with mushrooms can be tricky for me as well. I am not sure I have quite mastered it yet….but, after eating this dish I think I have discovered that I am not a big fan of dishes where mushrooms are the star. I do ok if they are a background flavor or ingredient, but I found myself picking around them in this dish to get to the “good stuff” … the chicken, noodles and pecans! The dish overall was very good, but I did not end up eating the leftovers because of the mushrooms...live, cook and learn!

If you want to see the other options and recipes for other nut butters, visit The Daring Kitchen’s post for this challenge. They even have a downloadable, printable PDF file there.
Recipe:
Chicken with Pecan Cream & Mushrooms
Yield: 4 servings
Recipe notes: Substitute your favorite pasta or rice in place of the egg noodles. Use fresh rosemary or parsley in place of thyme if you prefer.
Ingredients:
Pecan Cream:
3/4 cup (180 ml) coarsely chopped pecans*, toasted
1 cup (240 ml) water
¾ teaspoon (3 ml) salt, more as needed
½ pound (225 g) egg noodles or pasta
4 (6-ounce / 170 g) boneless, skinless chicken breast halves
1 teaspoon (5 ml) olive oil, more as needed
Salt & pepper to taste
Sauce:
1 tablespoon (15 ml) deglazing liquid (water, broth, wine; optional)
1 teaspoon (5 ml) olive oil, more as needed
1/4 cup (60 ml) finely chopped shallots
½ pound (225 g) mushrooms, sliced
1 Tablespoon (15 ml) fresh thyme leaves
Chopped pecans, (optional garnish)
Directions:
1. Prepare pecan cream. Grind pecans in a food processor for about a minute or so until smooth, scraping down the sides of bowl as needed. Add water and 3/4 teaspoon (3 ml) salt; process until smooth, scraping sides of bowl as needed. Set aside pecan cream. (*If starting with prepared pecan butter, blend ¼ cup plus 2 Tablespoons (90 ml) pecan butter with the water and salt until smooth.)
2. Cook noodles according to package instructions in salted water. Drain, rinse, and keep warm.
3. If desired, pound chicken to ¼ inch (6 mm) thickness to promote even cooking. Sprinkle with a bit of salt and pepper to taste. Heat 1 teaspoon (5 ml) olive oil a large nonstick skillet over medium-high heat. Add half the chicken; sauté 3 to 5 minutes on each side or until cooked through. Cook the chicken in 2 batches, adding more oil if needed for second batch. Set aside cooked chicken on a clean plate, cover to keep warm.
4. Add deglazing liquid to pan if using and stir up any browned bits. If needed, add another teaspoon (5 ml) of oil (or more) to pan for sautéing the shallots and mushrooms. Sauté the shallots and mushrooms over medium heat for 4 to 6 minutes or until mushrooms are tender and starting to brown. Add fresh thyme to the pan. Stir in pecan cream; bring to a boil. Reduce heat and simmer for about 1 1/2 minutes till reduced slightly.
5. Slice chicken into thin strips. Divide the noodles among serving plates. Add a scoop of the mushroom pecan sauce on top of noodles. Lay sliced chicken on top. Garnish with fresh thyme and/or a pinch of chopped pecans if desired.
Enjoy With Love,
Christina
According to Margie and Natashya, “Nutrition research suggests that nuts are good for your health. Nut butters, or pureed nuts, make it easy to use nuts in cooking. Although peanut butter is a staple in North America, most popular as the star ingredient in peanut butter and jelly sandwiches and beloved in peanut butter cookies and other sweets, it's seldom used in preparing savory dishes. Nut butters -- including not only peanut butter but almond, cashew, and walnut butters -- are common ingredients in many Asian and African countries, used in a wide array of savory dishes. Nut butters add complex & interesting flavors to dishes, provide body & thickness to sauces, and can be used to replace the dairy fats or other oils in recipes.”
The challenge this month was made a bit more interesting by requiring that we use our nut butters in a savory recipe. Margie and Natashya gave us a few recommendations and I chose to use the one for Chicken with Pecan Cream & Mushrooms.
The recipe is supposed to take 30 minutes start to finish and seemed to include ingredients that were normal and easy to deal with. The nut butter came together very easy. The food processor did all the work! The rest of the dish also seemed to come together fairly easy, though I have trouble cooking meat of any kind on the stovetop without setting off the fire alarms, turning on fans and opening doors (Did my mom teach me this method?! Love you mom!).
I doubled the cream/sauce recipe because I like my dishes to be saucy. Cooking with mushrooms can be tricky for me as well. I am not sure I have quite mastered it yet….but, after eating this dish I think I have discovered that I am not a big fan of dishes where mushrooms are the star. I do ok if they are a background flavor or ingredient, but I found myself picking around them in this dish to get to the “good stuff” … the chicken, noodles and pecans! The dish overall was very good, but I did not end up eating the leftovers because of the mushrooms...live, cook and learn!

If you want to see the other options and recipes for other nut butters, visit The Daring Kitchen’s post for this challenge. They even have a downloadable, printable PDF file there.
Recipe:
Chicken with Pecan Cream & Mushrooms
Yield: 4 servings
Recipe notes: Substitute your favorite pasta or rice in place of the egg noodles. Use fresh rosemary or parsley in place of thyme if you prefer.
Ingredients:
Pecan Cream:
3/4 cup (180 ml) coarsely chopped pecans*, toasted
1 cup (240 ml) water
¾ teaspoon (3 ml) salt, more as needed
½ pound (225 g) egg noodles or pasta
4 (6-ounce / 170 g) boneless, skinless chicken breast halves
1 teaspoon (5 ml) olive oil, more as needed
Salt & pepper to taste
Sauce:
1 tablespoon (15 ml) deglazing liquid (water, broth, wine; optional)
1 teaspoon (5 ml) olive oil, more as needed
1/4 cup (60 ml) finely chopped shallots
½ pound (225 g) mushrooms, sliced
1 Tablespoon (15 ml) fresh thyme leaves
Chopped pecans, (optional garnish)
Directions:
1. Prepare pecan cream. Grind pecans in a food processor for about a minute or so until smooth, scraping down the sides of bowl as needed. Add water and 3/4 teaspoon (3 ml) salt; process until smooth, scraping sides of bowl as needed. Set aside pecan cream. (*If starting with prepared pecan butter, blend ¼ cup plus 2 Tablespoons (90 ml) pecan butter with the water and salt until smooth.)
2. Cook noodles according to package instructions in salted water. Drain, rinse, and keep warm.
3. If desired, pound chicken to ¼ inch (6 mm) thickness to promote even cooking. Sprinkle with a bit of salt and pepper to taste. Heat 1 teaspoon (5 ml) olive oil a large nonstick skillet over medium-high heat. Add half the chicken; sauté 3 to 5 minutes on each side or until cooked through. Cook the chicken in 2 batches, adding more oil if needed for second batch. Set aside cooked chicken on a clean plate, cover to keep warm.
4. Add deglazing liquid to pan if using and stir up any browned bits. If needed, add another teaspoon (5 ml) of oil (or more) to pan for sautéing the shallots and mushrooms. Sauté the shallots and mushrooms over medium heat for 4 to 6 minutes or until mushrooms are tender and starting to brown. Add fresh thyme to the pan. Stir in pecan cream; bring to a boil. Reduce heat and simmer for about 1 1/2 minutes till reduced slightly.
5. Slice chicken into thin strips. Divide the noodles among serving plates. Add a scoop of the mushroom pecan sauce on top of noodles. Lay sliced chicken on top. Garnish with fresh thyme and/or a pinch of chopped pecans if desired.
Enjoy With Love,
Christina
Tuesday, June 15, 2010
A Bit of Shaking and a Bit of Baking in California
Ahhh, vacation! I recently went home to California to visit with my family and some friends. It was a much needed trip for my mental sanity! The main reason for going was for the 8th grade graduation of my middle niece, Carolyn. While there, I also enjoyed a night out with my girls from high school and celebrated the 9th birthday of my youngest niece, Samantha! Of course, I also had to be sure that my oldest niece, Jessica, had not grown too much taller than I am (not much success in this regard!).
While on vacation I tend to find lots of time to bake and cook with my mom. I absolutely adore cooking for and with my family. This trip I had planned to make lasagna from the Daring Bakers recipe I had made awhile back, only not making the pasta from scratch. Carolyn requested a “plain” cheesecake with strawberries for her party. Of course, I turned to the recipe from the Daring Bakers that I had successfully accomplished a few times. I had also offered to make a dessert for the get-together with my high school girlfriends. And of course, I had to make a little something for Samantha’s birthday.
The trip started off with my parents and all three of my nieces picking me up at the airport in San Francisco. The girls were ADORABLE with their chauffer signs for me…they lined up with their “Auntie Christina Ride” homemade signs. Can I tell you how much I adore those girls?! They each hold an extra special spot in this proud Auntie’s heart for sure.

We spent the day in San Francisco since we were there and it was still morning (well, Pacific time!) when I arrived. We went to lunch at the Delancey Street Restaurant. Good food, but even better was the service. If you are not familiar with the concept behind the restaurant, I suggest you go wander through their website (once you are done here of course!). The basic premise is that “Delancey Street Restaurant is a key training school of the Delancey Street Foundation, the country's largest self-help residential organization for people who have hit bottom to completely rebuild their lives.” Pretty cool, right?! Our server, Derek, was an absolute delight and the girls were still talking about his playful, fun service days later. He even gave Carolyn a candle to blow out on the dessert we shared and encouraged her to keep doing well in school. I would highly recommend anyone in the San Francisco area to go to this restaurant and support a great cause while getting a really good, decently priced meal.

After lunch, we wandered over to Ghirardelli Square, Fisherman’s Wharf and Pier 39. All of these places are classic San Francisco to me. It was a usually warm, sunny day in San Francisco so these tourist areas were jam-packed with people. We had a great time just being together and enjoying the sights and sounds of San Francisco though. We decided to take the long way home so that we could go over the Golden Gate Bridge. What a beautiful bridge! Here are a few photos of our day:


Day Three was Memorial Day. My mom and I decided to take my Grandma to the cemetery to place flowers on several family member graves, including my Grandpa’s. This was not an easy undertaking, but worth every second. I had not been to the graves of my Grandpa and Great-Grandparents in a really long time. It really brought home how long they have been gone and how much I still wish they were a part of my life. I have such fond memories of my Grandpa in particular. Sometimes I wonder how life would be different if he were still here to kiss my Grandma and me after he had freshly shaved with his bristle brush and “real” razor. I am sure he would have adored my nieces as much as I do, but they would definitely be a little rambunctious for his tastes…much like my sister and I probably were when we were young. It was a good day for remembering and also appreciating what we have now. It was good to spend time with Grandma doing something I know meant a lot to her as well.

Day Four mom and I went to Sacramento to tour a culinary school. Ahh…the dream! Of course, the expense of doing this as well as the fact that I would not be able to pay my mortgage makes it difficult to pursue. It was certainly fun to see and think about doing this though…who knows, maybe someday it will happen. Mom and I went to Old Sacramento for lunch. We ate at Rio City Café which is located right on the Sacramento River. The baja fish tacos were divine!! OMGoodness, so good! Yummm! After lunch we decided that we needed to purchase a few “turtles,” one of mom’s favorite candies. It was a good day with mom. It is always good to have mom/daughter time.

Day Five I spent with my friend Jane. Jane always encourages me and helps me think through things that are going on in my life. She knows my history, my heart and my struggles. She is one of the few people on this earth that knows me probably better than I even know myself at times. She is also one of my fiercest prayer warriors. Who knows what my life would be like without her prayer covering! She is also one of the most fun people to be around and oh boy, what a fun day we had! We had lunch with her sweet husband John, visited with her beautiful daughters, Anna and Audrey, and her fun-loving grandchildren. Once it was just us two we decided to have pizza for dinner, bake a cake and dye our hair! She decided to go back to her natural color and I decided to get a little crazy and go dark red! Oh the crazy things I do when Jane is around! I love it! Jane also shared a wonderfully easy and delicious recipe with me for the cake. It is a semi-homemade type recipe and is adaptable to pretty much any flavor you would want. I’m going to call it “Jane’s Easy Cake Recipe” because I don’t believe she shared the name of it with me. (Recipe below.) She made it a lemon flavor, and mmmmmm…it was good….. I left that night with a bit of sadness…I do love time spent with Jane.
Day Six was the big graduation day! I started the day though by spending some time with a friend from days gone by, Donna. We met at Starbucks and caught up on life. I am hoping that the next time I am home I get to spend more time with her and her family…I did promise to cook for her I believe!
After my morning with Donna, I hurried over to start the graduation fun! My parents and I took the girls to their favorite place to eat…Beijing Restaurant. They have a wonderful salad, huge potstickers and some seriously yummy food overall. The portions are such that it is best to do family style, and you will still go home with a take-out bag. After lunch we went back to get Carolyn ready for her graduation. I was honored to be asked to curl her hair for the big event. She looked so beautiful and grown up in her dress and graduation gown.
The graduation ceremony was excellent and after all the many photos were taken and diplomas awarded, Carolyn went off to party with her classmates. The rest of the family went to Chicago Uno’s for a light dinner. It was a good day…cannot believe that I have two nieces in high school now…are they growing up too fast or is it just me?!

Day Seven was spent spoiling my nieces! I took them to see the movie “Letters from Juliet,” we bowled two games at the local bowling alley and then capped off the day with dinner and ice cream at Weinerschnitzel! The movie was pretty cute, bowling is always a blast and how can you go wrong with fast food hot dogs from der Weinerschnitzel and ice cream from Tasty Freeze. It was great to have a day that was focused solely on what the girls wanted to do and just have fun. (One funny side story…when the lights first went out for the movie “Sex In The City 2” actually started…you have not seen an Auntie move so fast to protect her nieces delicate eyes…alerted the movie theater staff and they stopped the movie before anything got out of hand…the girls thought that was quite funny since my sister had very clearly said they could not see that movie…rightfully so!)

Day Eight was spent in the kitchen with mom! As mentioned earlier (in this now getting long) post, cheesecake was on the menu for Carolyn’s graduation party. The party was the next day, but cheesecakes have to chill overnight so I got started. I used the tried and true recipe from the Daring Bakers and it came out beautiful. The best part was using the real vanilla bean so that you could see all the flecks in the finished product.
I also had to make a dessert for my get together with my high school girlfriends. I had decided earlier in the week to make a Fresh Strawberry and Blueberry Tart to highlight the scrumptious fresh fruit that I had been enjoying all week (Recipe below). I also decided to take some fresh chocolate-dipped strawberries to add a touch of chocolate to the evening. The tart was easy to make over all, I had made it once before, but I quickly discovered that blueberries were harder to find than anticipated. I waited until that morning to purchase the fruit, wanting it to be at its’ peak freshness. I drove around town for about an hour and four stores later before I found them…ugh!
Feeling a bit frustrated, I started with the crust. The tart pan I had purchased earlier in the week (that’s right…had to purchase the pan too), was bigger than the recipe called for, but I didn’t think much of it until the first crust came out completely burnt. Starting over, I doubled the crust recipe…good choice, but the end product was a bit more than necessary. Next time, I will either have the right size pan or use one and a half the amount of crust the recipe calls for.


The evening overall was full of fun and laughter. It was so great to get with the girls from high school and catch up on life with them. I am amazed at how we have continued to stay connected. It has been longer than most of us care to admit since we spent our days hanging out in the band room, yet get us together and we are instantly transported to those days. The food brought by the other gals was so good and we were blessed to have Erika host at her beautiful home. That evening around the kitchen table with margaritas and yearbooks was a great reminder of just how far we have all come. We have all chosen different paths on our journey, but we are all happy and healthy…and we certainly have better hair!

Day Nine was the big graduation party for Carolyn. Lasagna from scratch was on the menu along with the usual sides. I spent the morning preparing the ragu sauce for the lasagna (sans veal…sadly it was not to be found in my hometown that week) using the Daring Bakers recipe from the past. There were a few hiccups in the day (cheesecake mishap which was thankfully easily fixed…party starting earlier than we remembered saying it would…three hours earlier!), but overall it was a great party to celebrate Carolyn’s accomplishment. The weather could not have been better for the day. Carolyn opened her gifts after we ate dinner and then we all enjoyed our sliver of cheesecake with strawberries. We took a few family photos and generally had a great time together.


Day Ten was my last day with the family, but it was also the day we decided to celebrate Samantha’s birthday! I decided to make cupcakes from the recipe Jane had given me because Samantha wanted vanilla cupcakes with vanilla frosting…she is a simple girl afterall. I used cheesecake flavored pudding because we had it in the house. They came out really well and were so moist! We took Samantha her cupcakes, helped her blow out her candles, watched her open her presents and then took her to lunch. We decided to go to one of their favorite Mexican restaurants. The “taco truck tacos” are soooo good at this place and surprisingly filling.

After lunch we played a bit of Guitar Hero (I am terrible…ugh!) and then said our goodbyes. It was time for me to head over to San Francisco again to get ready to fly back to DC. Hugs and kisses to all my girls and then my parents and I were off to the hotel. They checked me in and made sure I was settled before heading home. Tears are a mainstay at this point for mom and me, but it is ok…it just proves how much we still love and miss each other when we are apart.
I was fortunate to have one of my high school girls staying just down the street for her work that night. We had a fabulous dinner at the Elephant Café and just talked about life. It was a good way to bridge from being with family to being back on my own.
Day Eleven was spent on the plane…a thankfully uneventful flight. It was good to return to my cat, Marvin, who missed me terribly.
Sorry this post was so long…hope someone actually read all of this….maybe leave a comment if you did! HA! But if not, it was fun to get it all down so that I can look back and remember it for myself. Enjoy the recipes!
The Recipes:
Daring Bakers Lasagna
Daring Bakers Cheesecake
Jane’s Easy Cake Recipe
1 box white cake mix (use reduced sugar, if possible)
1 small box of instant pudding (sugar-free, if possible)
3 eggs
1 cup club soda
½ cup oil (vegetable)
½ cup nuts (optional)
Mix everything together and bake according to directions on the cake mix box.
Note: Jane used lemon pudding and added some lemon juice to hers…I used cheesecake pudding in the cupcakes for Samantha. I believe the “original” recipe called for pistachio pudding and pistachio nuts.
Fresh Strawberry and Blueberry Tart
Courtesy of Food Network
Directions
Almond Crust, recipe follows
Vanilla Pastry Cream, recipe follows
Ingredients
¼ teaspoon pure vanilla extract
¼ cup apricot jam
2 tablespoons brandy, or Kirsch
1 ½ cups sliced strawberries
1 cup blueberries, rinsed and patted dry
Fresh mint sprigs, garnish
Bake the pie crust according to the recipe and let cool completely on a wire rack. Spoon pastry cream into the crust, smoothing top.
In a small saucepan, combine the vanilla, jam and brandy. Bring to a simmer, stirring to dissolve the jam. Remove from the heat, strain and let cool.
Arrange the sliced strawberries in overlapping concentric circles around the top of the cream. Alternate with a row of blueberries. With a pastry brush, brush the tops with the jam glaze. Chill for at least 1 hour before serving.
To serve, lift the tart from the side of the pan and place on a serving dish or cake stand. Cut into wedges, and garnish each serving with a fresh mint sprig.
Almond Pastry Crust:
¼ cup slivered, blanched almonds, lightly toasted and cooled
1 ¼ cups all-purpose flour
3 tablespoons sugar
1/8 teaspoon salt
6 tablespoons cold unsalted butter, cut into pieces
1 large egg yolk
¼ teaspoon almond extract
3 tablespoons ice water (as needed)
In a food processor fitted with a metal blade, pulse to finely grind the almonds. Add the flour, sugar and salt, and process to blend. Add the butter and pulse until the mixture resembles coarse crumbs. With the machine running, add the egg yolk and extract through the feed tube and process until combined. Add the ice water and process just until a dough forms. Remove from the machine. Fit into a 9-inch tart pan with a removable bottom, pressing the dough first along the sides and then evenly across the bottom. Place in the freezer for at least 30 minutes to 1 hour.
Preheat the oven to 375 degrees F.
Line the dough with parchment paper and pie weights or beans. Bake for 15 minutes. Remove the parchment and weights and bake until golden brown, about 25 minutes. Remove from the oven and let cool completely on a wire rack before filling. Yield: 1 (9-inch) crust.
Vanilla and Orange Pastry Cream:
2 cups whole milk
½ cup sugar
1 vanilla bean, split in ½ lengthwise and seeds scraped out
1 teaspoon orange zest
1 tablespoon orange juice
4 large egg yolks
¼ cup cornstarch, measured, then sifted
In a medium, heavy saucepan, combine the milk, sugar, vanilla bean pods and seeds, orange zest and juice. Bring to a gentle boil over medium heat, whisking to dissolve the sugar. Remove from the heat.
In a medium bowl, whisk together the egg yolks and cornstarch until pale yellow, about 2 minutes. Slowly add 1/2 cup of the hot milk mixture to the egg yolks, whisking constantly until smooth. Add the egg yolk mixture to the pan of hot milk and whisk to combine. Return to medium heat and cook, stirring constantly with a heavy wooden spoon until the mixture thickens enough to coat the back of a spoon, about 3 minutes.
Remove from the heat and strain into a clean container, scraping the bottom of the strainer with a spoon. Discard the vanilla bean or rinse and reserve for another use. Cover with plastic wrap, pressing down against the surface to prevent a skin from forming. Refrigerate until well chilled, about 3 hours, before using. Yield: about 2 1/4 cups.
Enjoy With Love,
(Auntie) Christina
While on vacation I tend to find lots of time to bake and cook with my mom. I absolutely adore cooking for and with my family. This trip I had planned to make lasagna from the Daring Bakers recipe I had made awhile back, only not making the pasta from scratch. Carolyn requested a “plain” cheesecake with strawberries for her party. Of course, I turned to the recipe from the Daring Bakers that I had successfully accomplished a few times. I had also offered to make a dessert for the get-together with my high school girlfriends. And of course, I had to make a little something for Samantha’s birthday.
The trip started off with my parents and all three of my nieces picking me up at the airport in San Francisco. The girls were ADORABLE with their chauffer signs for me…they lined up with their “Auntie Christina Ride” homemade signs. Can I tell you how much I adore those girls?! They each hold an extra special spot in this proud Auntie’s heart for sure.

We spent the day in San Francisco since we were there and it was still morning (well, Pacific time!) when I arrived. We went to lunch at the Delancey Street Restaurant. Good food, but even better was the service. If you are not familiar with the concept behind the restaurant, I suggest you go wander through their website (once you are done here of course!). The basic premise is that “Delancey Street Restaurant is a key training school of the Delancey Street Foundation, the country's largest self-help residential organization for people who have hit bottom to completely rebuild their lives.” Pretty cool, right?! Our server, Derek, was an absolute delight and the girls were still talking about his playful, fun service days later. He even gave Carolyn a candle to blow out on the dessert we shared and encouraged her to keep doing well in school. I would highly recommend anyone in the San Francisco area to go to this restaurant and support a great cause while getting a really good, decently priced meal.

After lunch, we wandered over to Ghirardelli Square, Fisherman’s Wharf and Pier 39. All of these places are classic San Francisco to me. It was a usually warm, sunny day in San Francisco so these tourist areas were jam-packed with people. We had a great time just being together and enjoying the sights and sounds of San Francisco though. We decided to take the long way home so that we could go over the Golden Gate Bridge. What a beautiful bridge! Here are a few photos of our day:


Day Two was a day at home just hanging out and relaxing with my nieces. We watched a lot of Disney Channel! HA! It is such a joy to see how they have grown and continue to grow into young ladies. They are still very much “kids,” but I can also see how they are growing up as well. So proud of them and who they are becoming. I also had to ensure that they knew they would never grow too old (or too tall in Jessica’s case!) for their Auntie to love them. I simply adore being their Auntie. It was fun to just relax and let them be.
Day Three was Memorial Day. My mom and I decided to take my Grandma to the cemetery to place flowers on several family member graves, including my Grandpa’s. This was not an easy undertaking, but worth every second. I had not been to the graves of my Grandpa and Great-Grandparents in a really long time. It really brought home how long they have been gone and how much I still wish they were a part of my life. I have such fond memories of my Grandpa in particular. Sometimes I wonder how life would be different if he were still here to kiss my Grandma and me after he had freshly shaved with his bristle brush and “real” razor. I am sure he would have adored my nieces as much as I do, but they would definitely be a little rambunctious for his tastes…much like my sister and I probably were when we were young. It was a good day for remembering and also appreciating what we have now. It was good to spend time with Grandma doing something I know meant a lot to her as well.

Day Four mom and I went to Sacramento to tour a culinary school. Ahh…the dream! Of course, the expense of doing this as well as the fact that I would not be able to pay my mortgage makes it difficult to pursue. It was certainly fun to see and think about doing this though…who knows, maybe someday it will happen. Mom and I went to Old Sacramento for lunch. We ate at Rio City Café which is located right on the Sacramento River. The baja fish tacos were divine!! OMGoodness, so good! Yummm! After lunch we decided that we needed to purchase a few “turtles,” one of mom’s favorite candies. It was a good day with mom. It is always good to have mom/daughter time.

Day Five I spent with my friend Jane. Jane always encourages me and helps me think through things that are going on in my life. She knows my history, my heart and my struggles. She is one of the few people on this earth that knows me probably better than I even know myself at times. She is also one of my fiercest prayer warriors. Who knows what my life would be like without her prayer covering! She is also one of the most fun people to be around and oh boy, what a fun day we had! We had lunch with her sweet husband John, visited with her beautiful daughters, Anna and Audrey, and her fun-loving grandchildren. Once it was just us two we decided to have pizza for dinner, bake a cake and dye our hair! She decided to go back to her natural color and I decided to get a little crazy and go dark red! Oh the crazy things I do when Jane is around! I love it! Jane also shared a wonderfully easy and delicious recipe with me for the cake. It is a semi-homemade type recipe and is adaptable to pretty much any flavor you would want. I’m going to call it “Jane’s Easy Cake Recipe” because I don’t believe she shared the name of it with me. (Recipe below.) She made it a lemon flavor, and mmmmmm…it was good….. I left that night with a bit of sadness…I do love time spent with Jane.
Day Six was the big graduation day! I started the day though by spending some time with a friend from days gone by, Donna. We met at Starbucks and caught up on life. I am hoping that the next time I am home I get to spend more time with her and her family…I did promise to cook for her I believe!
After my morning with Donna, I hurried over to start the graduation fun! My parents and I took the girls to their favorite place to eat…Beijing Restaurant. They have a wonderful salad, huge potstickers and some seriously yummy food overall. The portions are such that it is best to do family style, and you will still go home with a take-out bag. After lunch we went back to get Carolyn ready for her graduation. I was honored to be asked to curl her hair for the big event. She looked so beautiful and grown up in her dress and graduation gown.
The graduation ceremony was excellent and after all the many photos were taken and diplomas awarded, Carolyn went off to party with her classmates. The rest of the family went to Chicago Uno’s for a light dinner. It was a good day…cannot believe that I have two nieces in high school now…are they growing up too fast or is it just me?!

Day Seven was spent spoiling my nieces! I took them to see the movie “Letters from Juliet,” we bowled two games at the local bowling alley and then capped off the day with dinner and ice cream at Weinerschnitzel! The movie was pretty cute, bowling is always a blast and how can you go wrong with fast food hot dogs from der Weinerschnitzel and ice cream from Tasty Freeze. It was great to have a day that was focused solely on what the girls wanted to do and just have fun. (One funny side story…when the lights first went out for the movie “Sex In The City 2” actually started…you have not seen an Auntie move so fast to protect her nieces delicate eyes…alerted the movie theater staff and they stopped the movie before anything got out of hand…the girls thought that was quite funny since my sister had very clearly said they could not see that movie…rightfully so!)

Day Eight was spent in the kitchen with mom! As mentioned earlier (in this now getting long) post, cheesecake was on the menu for Carolyn’s graduation party. The party was the next day, but cheesecakes have to chill overnight so I got started. I used the tried and true recipe from the Daring Bakers and it came out beautiful. The best part was using the real vanilla bean so that you could see all the flecks in the finished product.
I also had to make a dessert for my get together with my high school girlfriends. I had decided earlier in the week to make a Fresh Strawberry and Blueberry Tart to highlight the scrumptious fresh fruit that I had been enjoying all week (Recipe below). I also decided to take some fresh chocolate-dipped strawberries to add a touch of chocolate to the evening. The tart was easy to make over all, I had made it once before, but I quickly discovered that blueberries were harder to find than anticipated. I waited until that morning to purchase the fruit, wanting it to be at its’ peak freshness. I drove around town for about an hour and four stores later before I found them…ugh!
Feeling a bit frustrated, I started with the crust. The tart pan I had purchased earlier in the week (that’s right…had to purchase the pan too), was bigger than the recipe called for, but I didn’t think much of it until the first crust came out completely burnt. Starting over, I doubled the crust recipe…good choice, but the end product was a bit more than necessary. Next time, I will either have the right size pan or use one and a half the amount of crust the recipe calls for.


The evening overall was full of fun and laughter. It was so great to get with the girls from high school and catch up on life with them. I am amazed at how we have continued to stay connected. It has been longer than most of us care to admit since we spent our days hanging out in the band room, yet get us together and we are instantly transported to those days. The food brought by the other gals was so good and we were blessed to have Erika host at her beautiful home. That evening around the kitchen table with margaritas and yearbooks was a great reminder of just how far we have all come. We have all chosen different paths on our journey, but we are all happy and healthy…and we certainly have better hair!

Day Nine was the big graduation party for Carolyn. Lasagna from scratch was on the menu along with the usual sides. I spent the morning preparing the ragu sauce for the lasagna (sans veal…sadly it was not to be found in my hometown that week) using the Daring Bakers recipe from the past. There were a few hiccups in the day (cheesecake mishap which was thankfully easily fixed…party starting earlier than we remembered saying it would…three hours earlier!), but overall it was a great party to celebrate Carolyn’s accomplishment. The weather could not have been better for the day. Carolyn opened her gifts after we ate dinner and then we all enjoyed our sliver of cheesecake with strawberries. We took a few family photos and generally had a great time together.
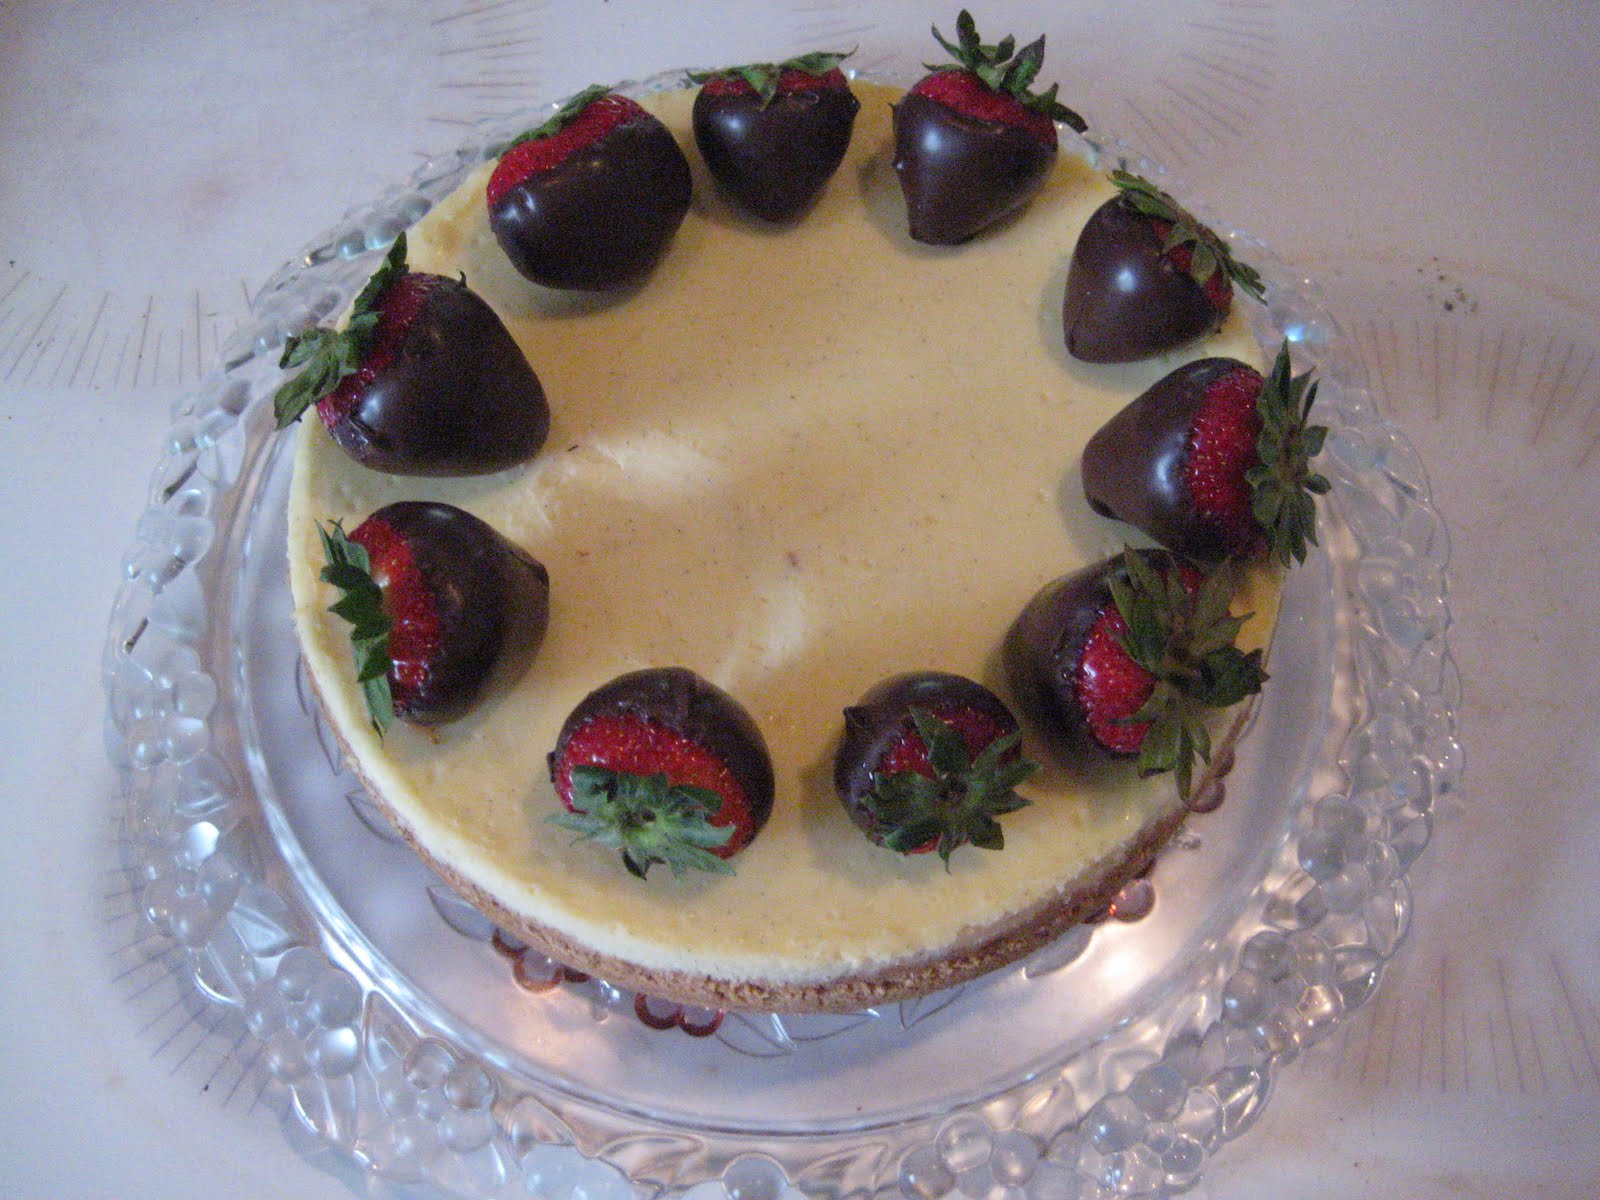
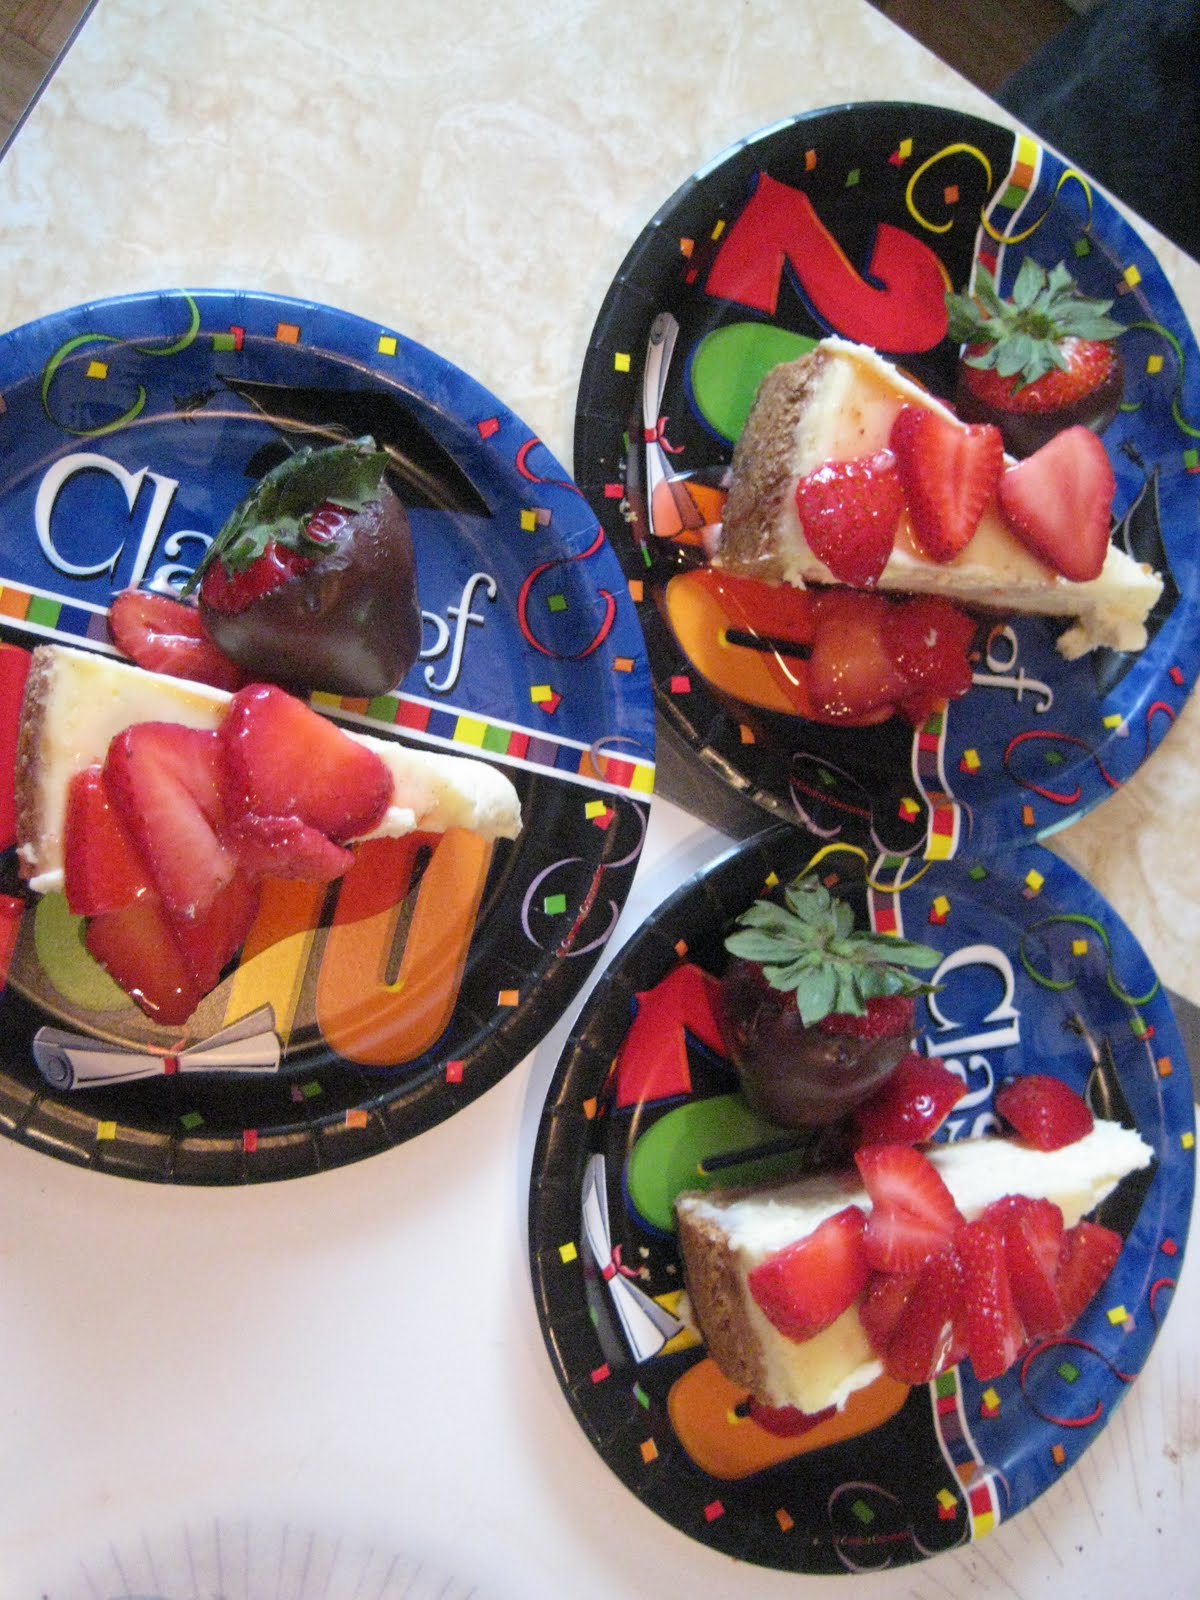


Day Ten was my last day with the family, but it was also the day we decided to celebrate Samantha’s birthday! I decided to make cupcakes from the recipe Jane had given me because Samantha wanted vanilla cupcakes with vanilla frosting…she is a simple girl afterall. I used cheesecake flavored pudding because we had it in the house. They came out really well and were so moist! We took Samantha her cupcakes, helped her blow out her candles, watched her open her presents and then took her to lunch. We decided to go to one of their favorite Mexican restaurants. The “taco truck tacos” are soooo good at this place and surprisingly filling.

After lunch we played a bit of Guitar Hero (I am terrible…ugh!) and then said our goodbyes. It was time for me to head over to San Francisco again to get ready to fly back to DC. Hugs and kisses to all my girls and then my parents and I were off to the hotel. They checked me in and made sure I was settled before heading home. Tears are a mainstay at this point for mom and me, but it is ok…it just proves how much we still love and miss each other when we are apart.
I was fortunate to have one of my high school girls staying just down the street for her work that night. We had a fabulous dinner at the Elephant Café and just talked about life. It was a good way to bridge from being with family to being back on my own.
Day Eleven was spent on the plane…a thankfully uneventful flight. It was good to return to my cat, Marvin, who missed me terribly.
Sorry this post was so long…hope someone actually read all of this….maybe leave a comment if you did! HA! But if not, it was fun to get it all down so that I can look back and remember it for myself. Enjoy the recipes!
The Recipes:
Daring Bakers Lasagna
Daring Bakers Cheesecake
Jane’s Easy Cake Recipe
1 box white cake mix (use reduced sugar, if possible)
1 small box of instant pudding (sugar-free, if possible)
3 eggs
1 cup club soda
½ cup oil (vegetable)
½ cup nuts (optional)
Mix everything together and bake according to directions on the cake mix box.
Note: Jane used lemon pudding and added some lemon juice to hers…I used cheesecake pudding in the cupcakes for Samantha. I believe the “original” recipe called for pistachio pudding and pistachio nuts.
Fresh Strawberry and Blueberry Tart
Courtesy of Food Network
Directions
Almond Crust, recipe follows
Vanilla Pastry Cream, recipe follows
Ingredients
¼ teaspoon pure vanilla extract
¼ cup apricot jam
2 tablespoons brandy, or Kirsch
1 ½ cups sliced strawberries
1 cup blueberries, rinsed and patted dry
Fresh mint sprigs, garnish
Bake the pie crust according to the recipe and let cool completely on a wire rack. Spoon pastry cream into the crust, smoothing top.
In a small saucepan, combine the vanilla, jam and brandy. Bring to a simmer, stirring to dissolve the jam. Remove from the heat, strain and let cool.
Arrange the sliced strawberries in overlapping concentric circles around the top of the cream. Alternate with a row of blueberries. With a pastry brush, brush the tops with the jam glaze. Chill for at least 1 hour before serving.
To serve, lift the tart from the side of the pan and place on a serving dish or cake stand. Cut into wedges, and garnish each serving with a fresh mint sprig.
Almond Pastry Crust:
¼ cup slivered, blanched almonds, lightly toasted and cooled
1 ¼ cups all-purpose flour
3 tablespoons sugar
1/8 teaspoon salt
6 tablespoons cold unsalted butter, cut into pieces
1 large egg yolk
¼ teaspoon almond extract
3 tablespoons ice water (as needed)
In a food processor fitted with a metal blade, pulse to finely grind the almonds. Add the flour, sugar and salt, and process to blend. Add the butter and pulse until the mixture resembles coarse crumbs. With the machine running, add the egg yolk and extract through the feed tube and process until combined. Add the ice water and process just until a dough forms. Remove from the machine. Fit into a 9-inch tart pan with a removable bottom, pressing the dough first along the sides and then evenly across the bottom. Place in the freezer for at least 30 minutes to 1 hour.
Preheat the oven to 375 degrees F.
Line the dough with parchment paper and pie weights or beans. Bake for 15 minutes. Remove the parchment and weights and bake until golden brown, about 25 minutes. Remove from the oven and let cool completely on a wire rack before filling. Yield: 1 (9-inch) crust.
Vanilla and Orange Pastry Cream:
2 cups whole milk
½ cup sugar
1 vanilla bean, split in ½ lengthwise and seeds scraped out
1 teaspoon orange zest
1 tablespoon orange juice
4 large egg yolks
¼ cup cornstarch, measured, then sifted
In a medium, heavy saucepan, combine the milk, sugar, vanilla bean pods and seeds, orange zest and juice. Bring to a gentle boil over medium heat, whisking to dissolve the sugar. Remove from the heat.
In a medium bowl, whisk together the egg yolks and cornstarch until pale yellow, about 2 minutes. Slowly add 1/2 cup of the hot milk mixture to the egg yolks, whisking constantly until smooth. Add the egg yolk mixture to the pan of hot milk and whisk to combine. Return to medium heat and cook, stirring constantly with a heavy wooden spoon until the mixture thickens enough to coat the back of a spoon, about 3 minutes.
Remove from the heat and strain into a clean container, scraping the bottom of the strainer with a spoon. Discard the vanilla bean or rinse and reserve for another use. Cover with plastic wrap, pressing down against the surface to prevent a skin from forming. Refrigerate until well chilled, about 3 hours, before using. Yield: about 2 1/4 cups.
Enjoy With Love,
(Auntie) Christina
Thursday, May 27, 2010
Daring Bakers: Piece Montée or Croquembouche (May 2010)
The May 2010 Daring Bakers’ challenge was hosted by Cat of Little Miss Cupcake. Cat challenged everyone to make a piece montée, or croquembouche, based on recipes from Peter Kump’s Baking School in Manhattan and Nick Malgieri.
Ahh...the traditional French wedding cake. Different and delicious. This month's challenge came as a relief in some ways. Since I'd just finished my classes at Cookology where we had made creme puffs, I knew I could ace that part of the challenge. *phew*
So, it was with a bit of an "I've got this one" attitude that I entered the kitchen. Honestly, it wasn't until I realized that the cream had to chill over night that I ran into my first problem. (I really do need to get better at reading the ENTIRE recipe before I start.) But, that was easily remedied...I'd just have to wait.
The pate choux recipe that was given worked like a charm for me. I used some of the tips I'd heard at the baking bootcamp classes and passed them along to my fellow Daring Bakers. The two that seemed to be most relevant were: 1) Dump all of the eggs in at once, not one at a time. I don't know why this works, but it does. Keep in mind that you must stir by hand with a wooden spoon and your arm will feel like it wants to fall off before you're done...this is normal. Smile! 2) As soon as the puffs come out of the oven, poke a hole in the top with a really sharp paring knife. This allows the steam to escape and helps the dough to not get soggy, thereby falling.
My puffs puffed beautifully, they stayed beautifully puffed. The creme came out super yummy. I was well on my way to Piece Montee success! It was once I started to fill the puffs that I realized, I shouldn't have halved the creme recipe as suggested. Sure, we were given two recipes (one for vanilla, which I made, and one for chocolate, which I thought I'd make but didn't), but I only made one. I didn't have a lot of finished creme puffs. But I pressed on thinking, "Ahh, no worries, it just won't be as tall!" This turned out to be true...and a bit sad.
The other area where I ran into trouble, I mean challenges which make me a better baker, were the stacking and glazing. Oh sure...chocolate was my choice, but only because making caramel still terrifies me. I know, I know... practice, practice, practice...but I wasn't in the mood to severely burn myself or ruin the few finished creme puffs I had. I don't think my chocolate glaze was much of a success though (as you'll see in the photos below).
Individually, the puffs looked and tasted wonderful. The filing was creamy and had just the right sweetness. The chocolate added a touch of glamour and the puff itself was airy and light. Ahh....if only the challenge had been to make creme puffs alone....
But, alas, the challenge was to stack these balls of deliciousness into a cone shape and drizzle beautifully. So, I started to stack, using chocolate as my glue. I think it went ok, it worked, it retained its shape and didn't fall over or crumble to the floor. That's success right?! Right?! :::Sigh:::
Once stacked, I turned to the glazing/drizzling part. I had a feeling now that this part of the challenge, which initially sounded like an afterthought, was going to be the most difficult. I was right. My chocolate should have been mixed into a ganache, but I didn't realize that until it was too late. SO, I got this:

Trust me, it tasted great....but I certainly won't be offering to make for a special occastion like a French wedding anytime soon....
This was a good reminder that sometimes, it's the simplest steps that trip us up. Onward....I will conquer caramel....someday....
The Recipe:
Piece Montée or Croquembouche
Preparation time:You will want to use your puff pastry batter and chocolate glaze or caramel as soon as it has been prepared and as close to serving time as possible. This is not a dessert that stores well and it may be a bit temperamental in humid areas as the glaze needs to harden to hold the choux together. The crème patissiere can be made a couple of days in advance and stored in the fridge until ready to use.
You will need approximately 10 minutes to prepare the puff pastry, 10 minutes to pipe and about 30 minutes to bake each batch. The crème patissiere should take about 10 minutes to cook and then will need to be cooled for at least 6 hours or overnight. The glazes take about 10 minutes to prepare.
Ingredients:
For the Vanilla Crème Patissiere (Half Batch)
1 cup (225 ml.) whole milk
2 Tbsp. cornstarch
6 Tbsp. (100 g.) sugar
1 large egg
2 large egg yolks
2 Tbsp. (30 g.) unsalted butter
1 Tsp. Vanilla
Dissolve cornstarch in ¼ cup of milk. Combine the remaining milk with the sugar in a saucepan; bring to boil; remove from heat.
Beat the whole egg, then the yolks into the cornstarch mixture. Pour 1/3 of boiling milk into the egg mixture, whisking constantly so that the eggs do not begin to cook.
Return the remaining milk to boil. Pour in the hot egg mixture in a stream, continuing whisking.
Continue whisking (this is important – you do not want the eggs to solidify/cook) until the cream thickens and comes to a boil. Remove from heat and beat in the butter and vanilla.
Pour cream into a stainless steel/ceramic bowl. Press plastic wrap firmly against the surface. Chill immediately and until ready to use.
For Chocolate Pastry Cream (Half Batch Recipe):
Bring ¼ cup (about 50 cl.) milk to a boil in a small pan; remove from heat and add in 3 ounces (about 80 g.) semisweet chocolate, finely chopped, and mix until smooth. Whisk into pastry cream when you add the butter and vanilla.
For Coffee Pastry Cream (Half Batch recipe)
Dissolve 1 ½ teaspoons instant espresso powder in 1 ½ teaspoons boiling water. Whisk into pastry cream with butter and vanilla.
Pate a Choux (Yield: About 28)
¾ cup (175 ml.) water
6 Tbsp. (85 g.) unsalted butter
¼ Tsp. salt
1 Tbsp. sugar
1 cup (125 g.) all-purpose flour
4 large eggs
For Egg Wash:
1 egg and pinch of salt
Pre-heat oven to 425◦F/220◦C degrees. Line two baking sheets with parchment paper.
Preparing batter:
Combine water, butter, salt and sugar in a saucepan over medium heat. Bring to a boil and stir occasionally. At boil, remove from heat and sift in the flour, stirring to combine completely.
Return to heat and cook, stirring constantly until the batter dries slightly and begins to pull away from the sides of the pan.
Transfer to a bowl and stir with a wooden spoon 1 minute to cool slightly.
Add 1 egg. The batter will appear loose and shiny.
As you stir, the batter will become dry-looking like lightly buttered mashed potatoes.
It is at this point that you will add in the next egg. Repeat until you have incorporated all the eggs.
Piping:
Transfer batter to a pastry bag fitted with a large open tip (I piped directly from the bag opening without a tip). Pipe choux about 1 inch-part in the baking sheets. Choux should be about 1 inch high about 1 inch wide.
Using a clean finger dipped in hot water, gently press down on any tips that have formed on the top of choux when piping. You want them to retain their ball shape, but be smoothly curved on top. Brush tops with egg wash (1 egg lightly beaten with pinch of salt).
Baking:
Bake the choux at 425◦F/220◦C degrees until well-puffed and turning lightly golden in color, about 10 minutes.
Lower the temperature to 350◦F/180◦C degrees and continue baking until well-colored and dry, about 20 minutes more. Remove to a rack and cool.
Can be stored in a airtight box overnight.
Filling:
When you are ready to assemble your piece montée, using a plain pastry tip, pierce the bottom of each choux. Fill the choux with pastry cream using either the same tip or a star tip, and place on a paper-lined sheet. Choux can be refrigerated briefly at this point while you make your glaze.
Use one of these to top your choux and assemble your piece montée.
Chocolate Glaze:
8 ounces/200 g. finely chopped chocolate (use the finest quality you can afford as the taste will be quite pronounced; I recommend semi-sweet)
Melt chocolate in microwave or double boiler. Stir at regular intervals to avoid burning. Use the best quality chocolate you can afford. Use immediately.
Hard Caramel Glaze:
1 cup (225 g.) sugar
½ teaspoon lemon juice
Combine sugar and lemon juice in a saucepan with a metal kitchen spoon stirring until the sugar resembles wet sand. Place on medium heat; heat without stirring until sugar starts to melt around the sides of the pan and the center begins to smoke. Begin to stir sugar. Continue heating, stirring occasionally until the sugar is a clear, amber color. Remove from heat immediately; place bottom of pan in ice water to stop the cooking. Use immediately.
Assembly of your Piece Montée:
You may want to lay out your unfilled, unglazed choux in a practice design to get a feel for how to assemble the final dessert. For example, if making a conical shape, trace a circle (no bigger than 8 inches) on a piece of parchment to use as a pattern. Then take some of the larger choux and assemble them in the circle for the bottom layer. Practice seeing which pieces fit together best.
Once you are ready to assemble your piece montée, dip the top of each choux in your glaze (careful it may be still hot!), and start assembling on your cake board/plate/sheet. Continue dipping and adding choux in levels using the glaze to hold them together as you build up.
When you have finished the design of your piece montée, you may drizzle with remaining glaze or use ribbons, sugar cookie cut-outs, almonds, flowers, etc. to decorate. Have fun and enjoy! Bon appétit!
Enjoy With Love,
Christina
Subscribe to:
Posts (Atom)